Use one set of credentials to conveniently access Startly and all your Microsoft apps. Startly utilizes OpenID Connect (OIDC) and OAuth for the Microsoft integration for SSO.
Set-Up Instructions
In Microsoft Azure
- Log in to Azure
- Click on App registrations
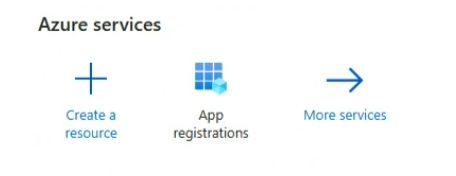
If you don’t see the App registrations icon:
- Select More Services
- Scroll to the Identity section
- Select App registrations
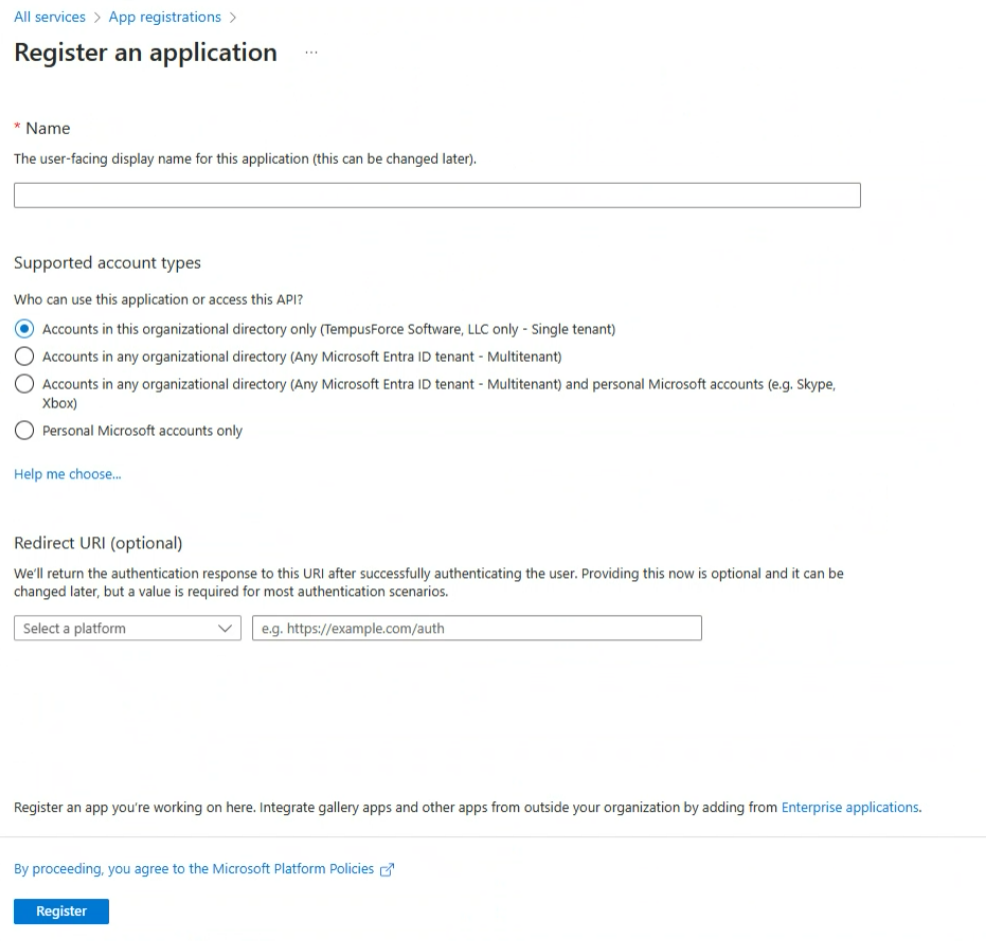
- Click on the New Registration button
- Enter a name for the application (ex. Startly SSO)
- Select Accounts in this organizational directory only for who can use this application or access this API.
- Click on the Register button
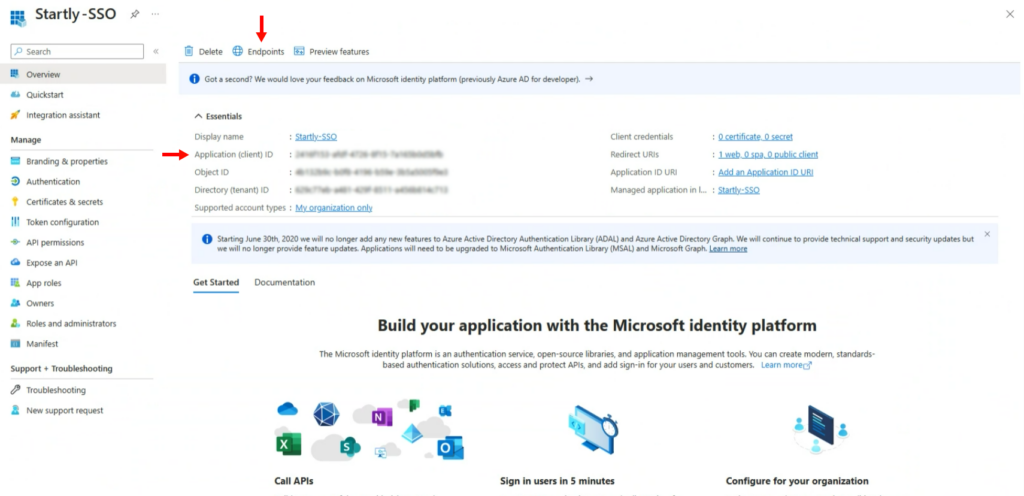
- From the App Registrations page of your new app (ex. Startly SSO):
- Copy the Application (client) ID and paste it to Notepad to enter later into Startly.
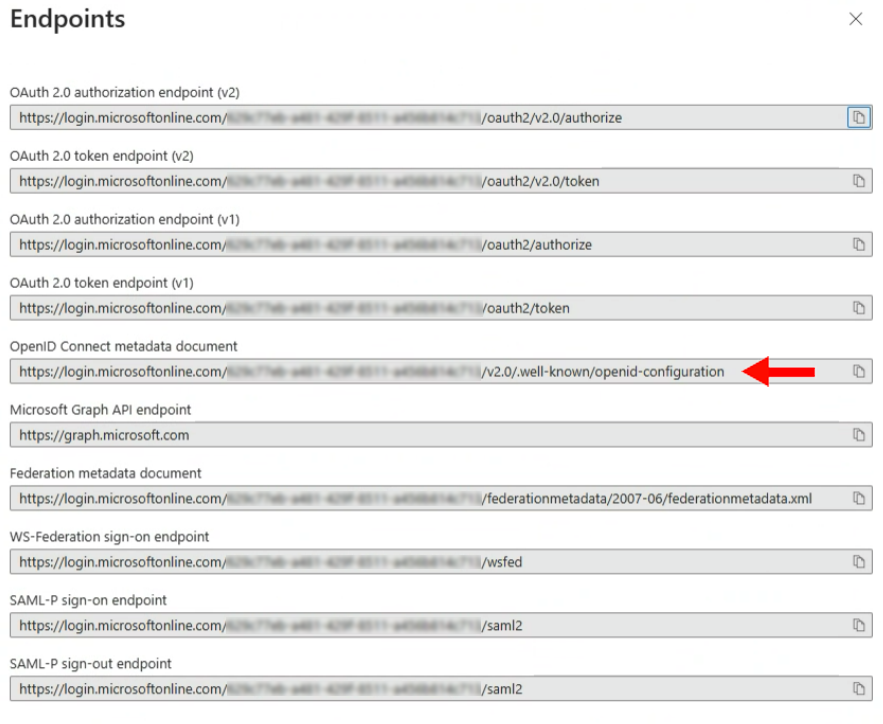
- Click on the Endpoints tab
- Copy the Open ID Connect Metadata document to Notepad to enter later into Startly.
- Close the Endpoints drawer.
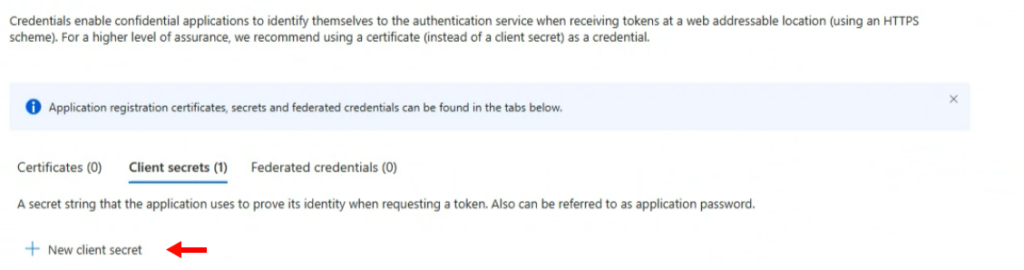
- From the Overview page, click on the Add a certificate or secret link next to Client credentials
- Click the New client secret button
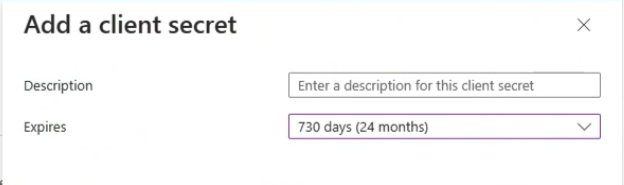
- Enter the same name of your application (ex. Startly SSO) into the Description of the secret
- Select an expiration date (we recommend two years)
- Click the Add button.
- Copy the Value of the Client Secret to Notepad to enter later into Startly.
In Startly
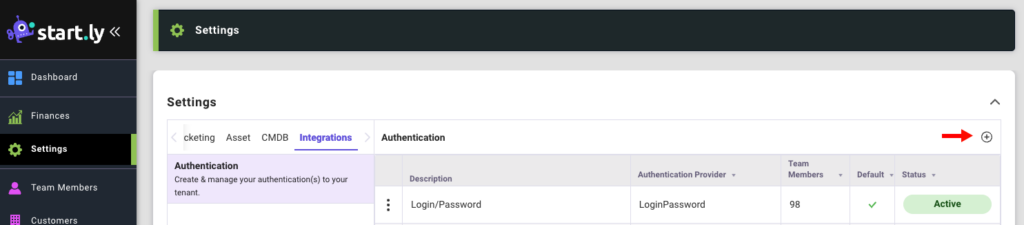
- Click on the Settings menu from the left nav.
- Select the Integrations category.
- Select the Authentications setting.
- Click the + Icon to add a new authentication
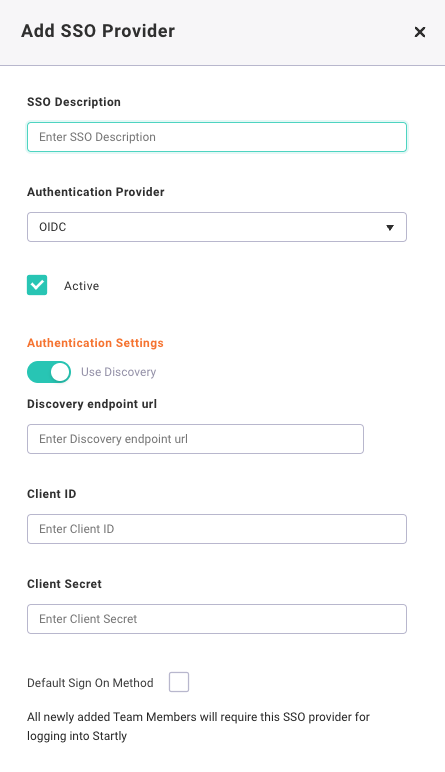
- Enter the SSO Description
- Select the Provider – OIDC
- Confirm that the Use Discovery feature is turned on.
- From Notepad, copy the Client ID into the Client ID field in Startly.
- From Notepad, copy the Client Secret into the Client Secret field in Startly.
- From Notepad, copy the OpenID Connect metadata document into the Discovery endpoint URL field in Startly.
- Confirm the URL was verified. A green checkmark should appear when verified.
- Click Save
From Startly to Microsoft Azure
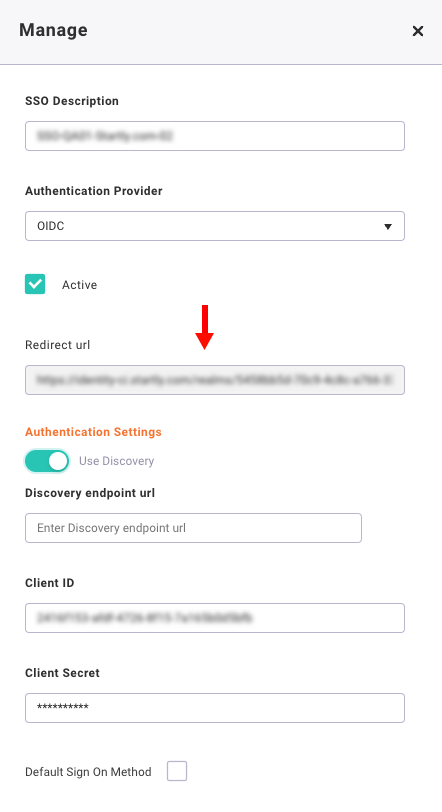
- In Startly:
- Open the Authentication Configuration you just created.
- Copy the read only Redirect URL field to Notepad to enter into Azure.
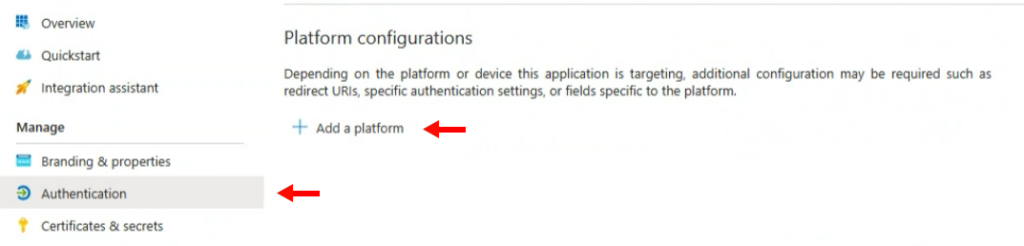
- In Microsoft Azure
- From the App Registration page, click Authentication from the left side menu.
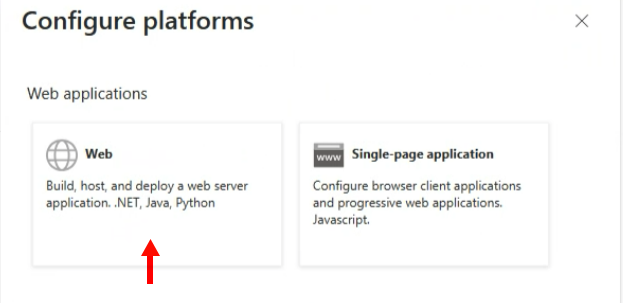
- Click Add a platform
- Select Web
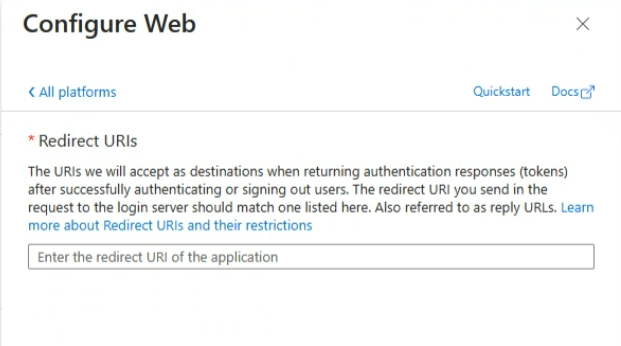
- In the Redirect URIs field, paste the Redirect URL copied from Startly.
- Click Configure.