Use one set of credentials to conveniently access Startly via your Okta instance. Startly utilizes OpenID Connect (OIDC) for the Okta integration for SSO.
Set-Up Instructions
In Okta Admin console
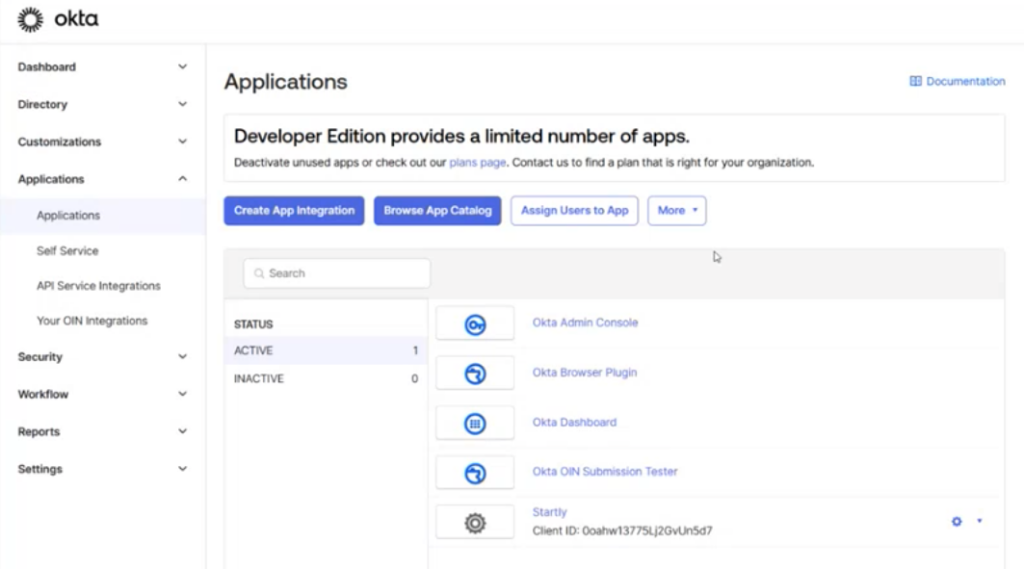
- Open the Okta Admin Console
- Select Applications from the left nav menu
- Select Applications from the sub menu of Applications in the left nav menu
- Click the Create App Integration button
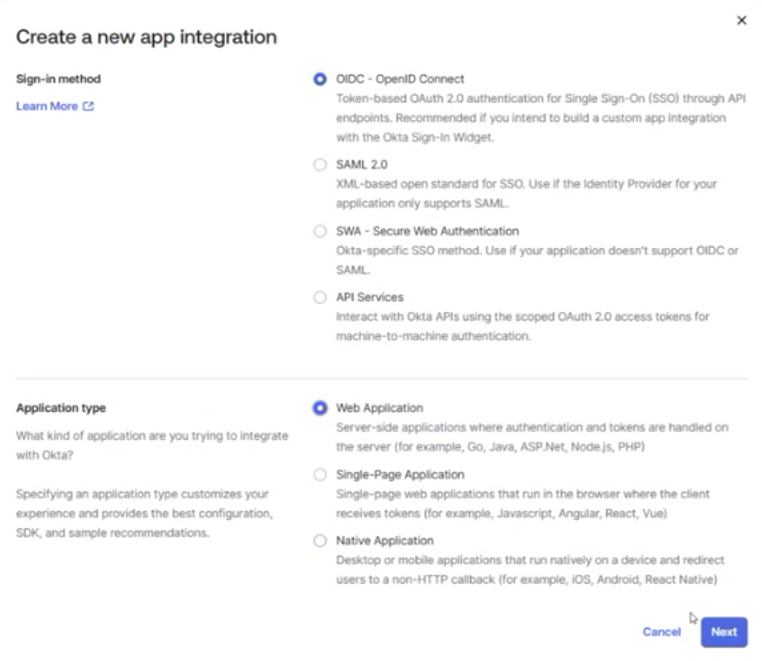
- Create a new app integration by:
- Under Sign-in method, select OIDC – OpenID Connect
- Under Application type, select Web Application
- Click on the Next button
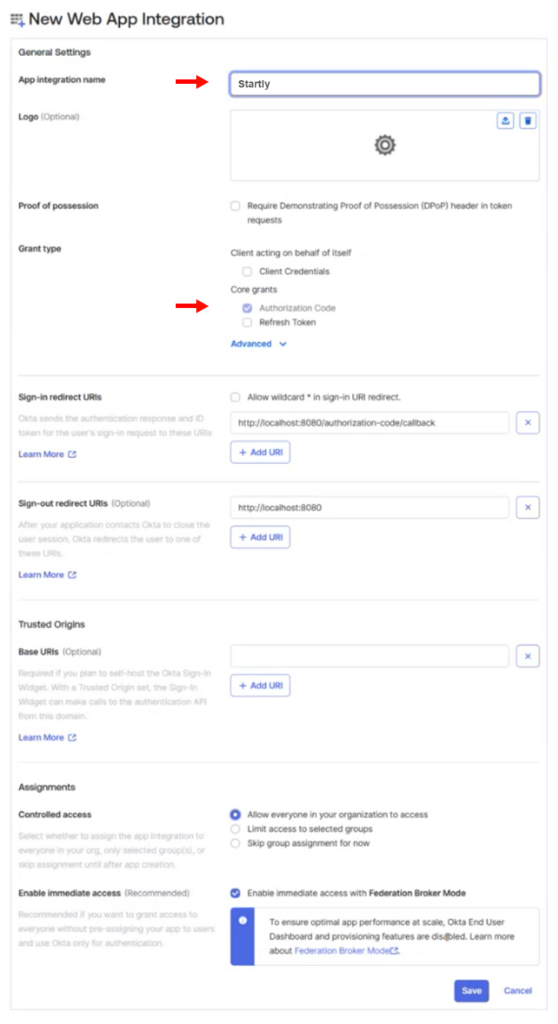
- New Web App Integration Form:
- Under General Settings, enter a name for your App integration (e.g. Startly)
- Under Grant type, select Authorization Code
- Nothing is needed at this point for the Sign-In or the Sign-Out URIs, we will come back for these later in the process.
- Under the Assignments section, select Allow everyone in your organization to access
- Make sure Enable immediate access with Federation Broker Mode is selected.
- Click on the Save button
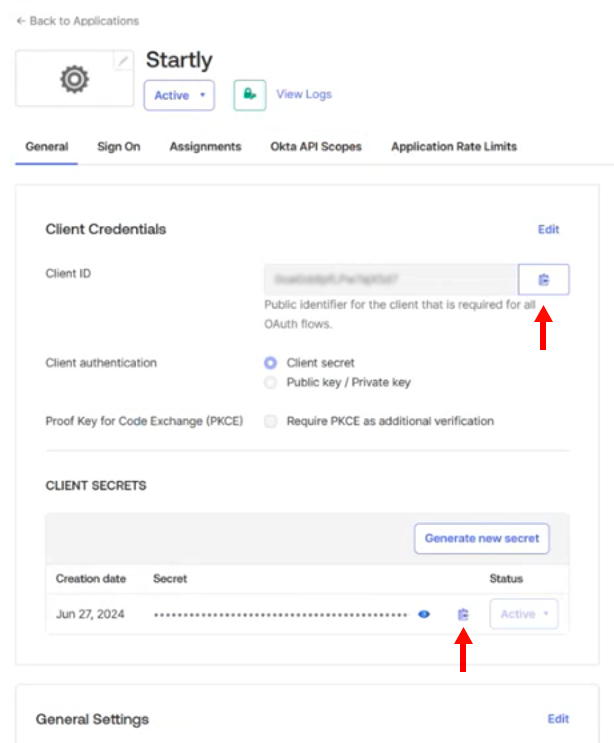
- From the Integration Page:
- Copy the Client ID and paste it to Notepad to enter later into Startly.
- Copy the Client Secret and paste it to Notepad to enter later into Startly.
In Startly
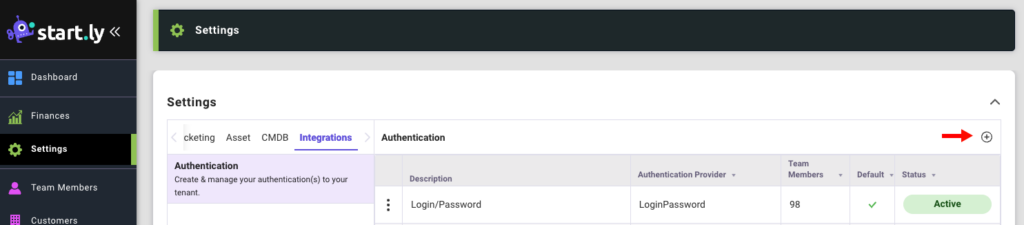
- Click on the Settings menu from the left nav.
- Select the Integrations category.
- Select the Authentication setting.
- Click the + Icon to add a new authentication
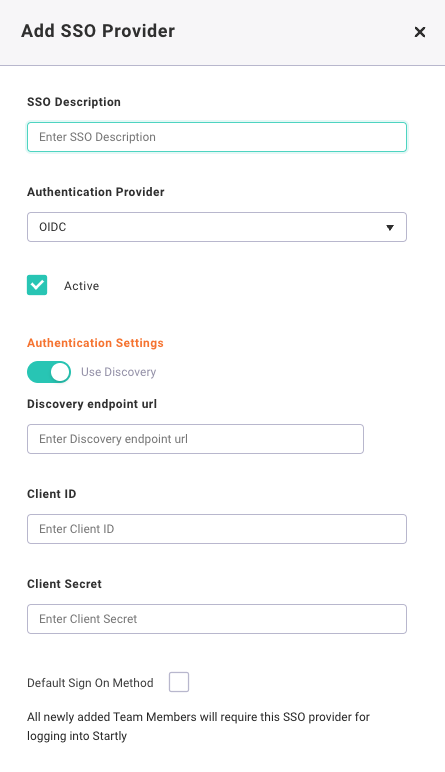
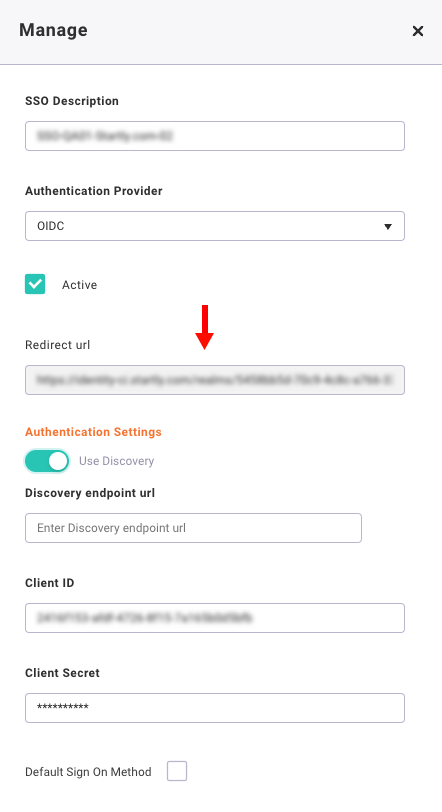
- Enter the SSO Description (e.g. Okta)
- Select the Provider – OIDC
- Confirm that the Use Discovery feature is turned on.
- Enter the following in the Discovery endpoint url: https://organization_subdomain.okta.com/.well-known/openid-configuration. Make sure to replace the organization subdomain in the url with your Okta instance subdomain.
- Confirm the URL was verified. A green checkmark should appear when verified.
- From Notepad, copy the Client ID into the Client ID field in Startly.
- From Notepad, copy the Client Secret into the Client Secret field in Startly.
- Click Save
From Startly to Okta
- In Startly:
- Open the Authentication Configuration you just created.
- Copy the read only Redirect URL field to Notepad to enter into Okta.
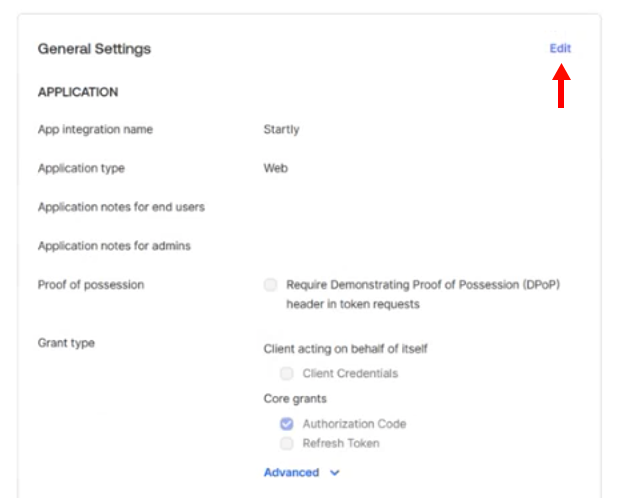
- In the Okta Admin Console
- From the App Integration page, click Edit in the upper right of the General Settings section.
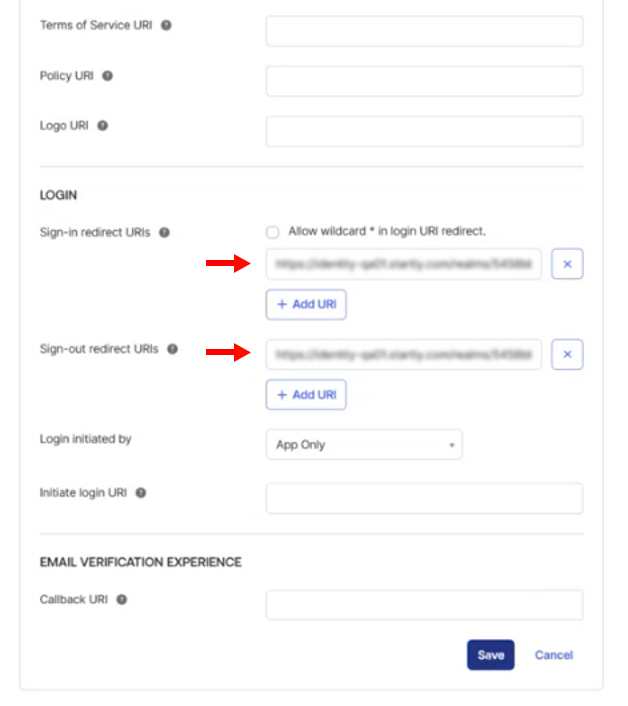
- In the Sign-in redirect URIs field, paste the Redirect URL copied from Startly.
- In the Sign-out redirect URIs field, paste the Redirect URL copied from Startly and add /logout_response to the end of the Redirect.
- Click Save.