This article details the basics of how to create new Projects and manage Projects within your organization.
Projects Menu and Projects List
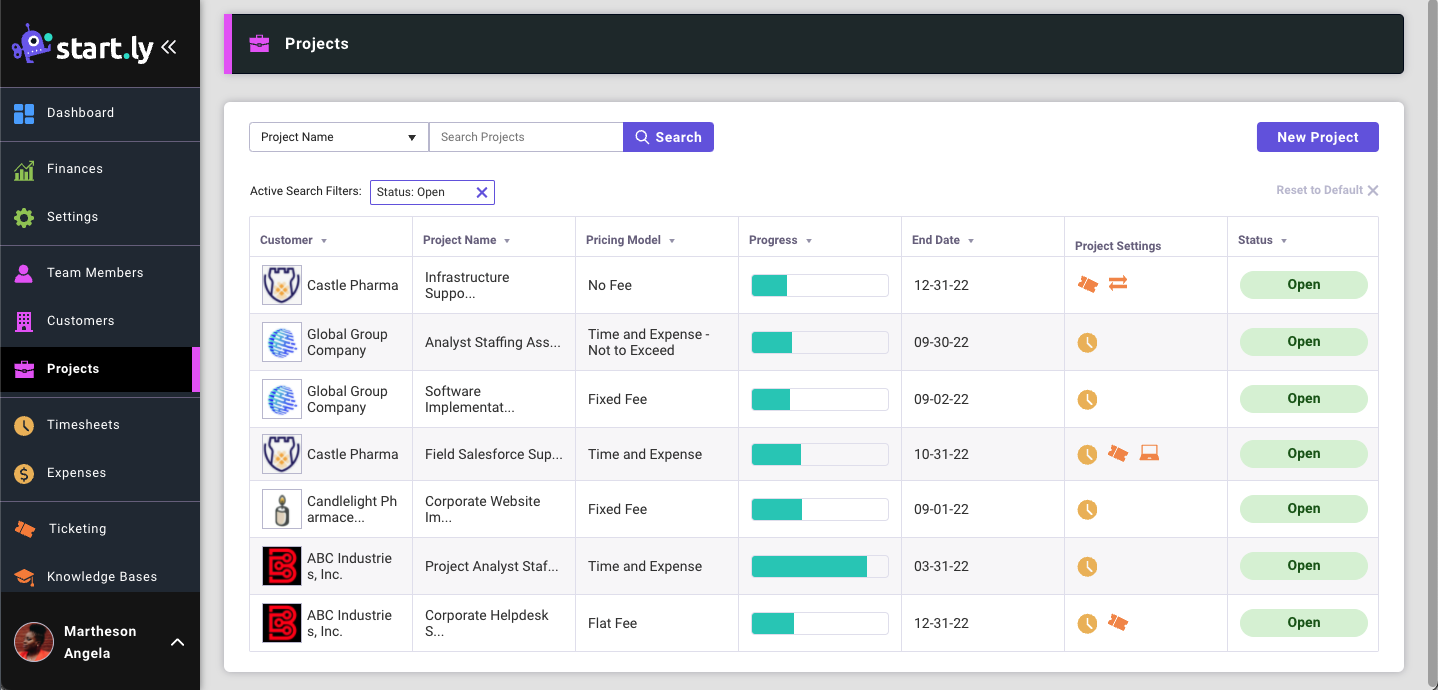
The Projects menu provides access to the Projects list screen. From the Projects List screen, you can select a Project to manage or take action on, search for a Project, or create a new Project.
NOTE: Only Administrators can access the Projects menu and can manage Projects within your organization.
By default, only active (or open) Projects are displayed in the list. Use the Search tool to find inactive or closed Projects.
Creating New Projects
Creating a new Project is a simple process that unleashes a lot of powerful features of our application.
To create a New Project:
- Form the Projects list screen, select the New Project button in the upper-right corner.
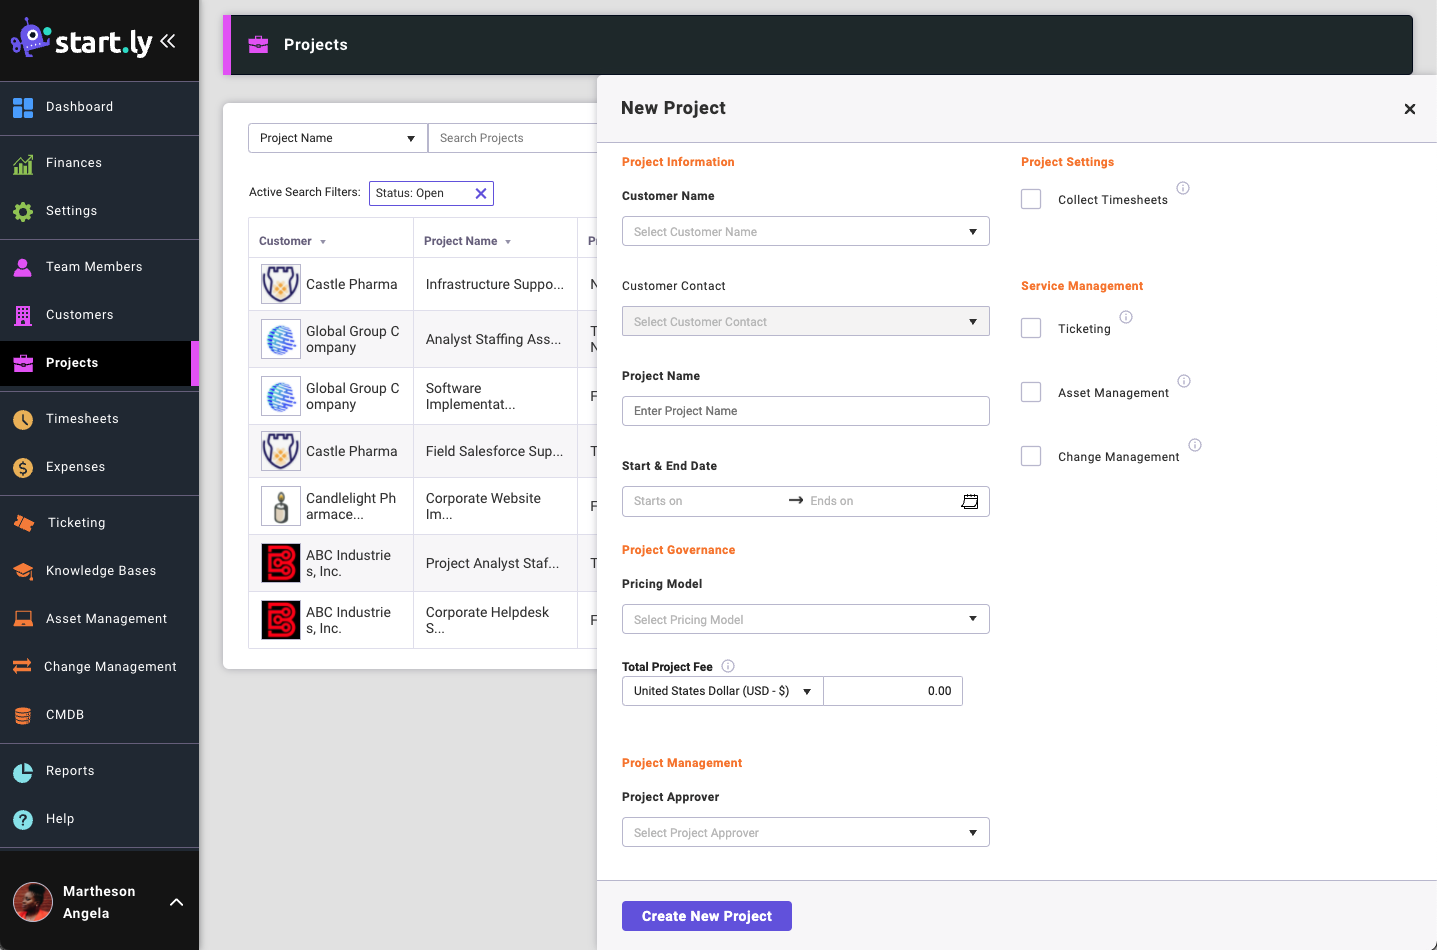
- The New Project screen appears. Required fields are in bold:
- Customer Name
- Project Name
- Start and End Dates
- Pricing Model
- Total Project Fee
- Project Approver
- Project Settings and Service Management Settings
- When completed, select the Create New Project button at the bottom of the form. The Project will be created, and you will be taken to that project’s dashboard.
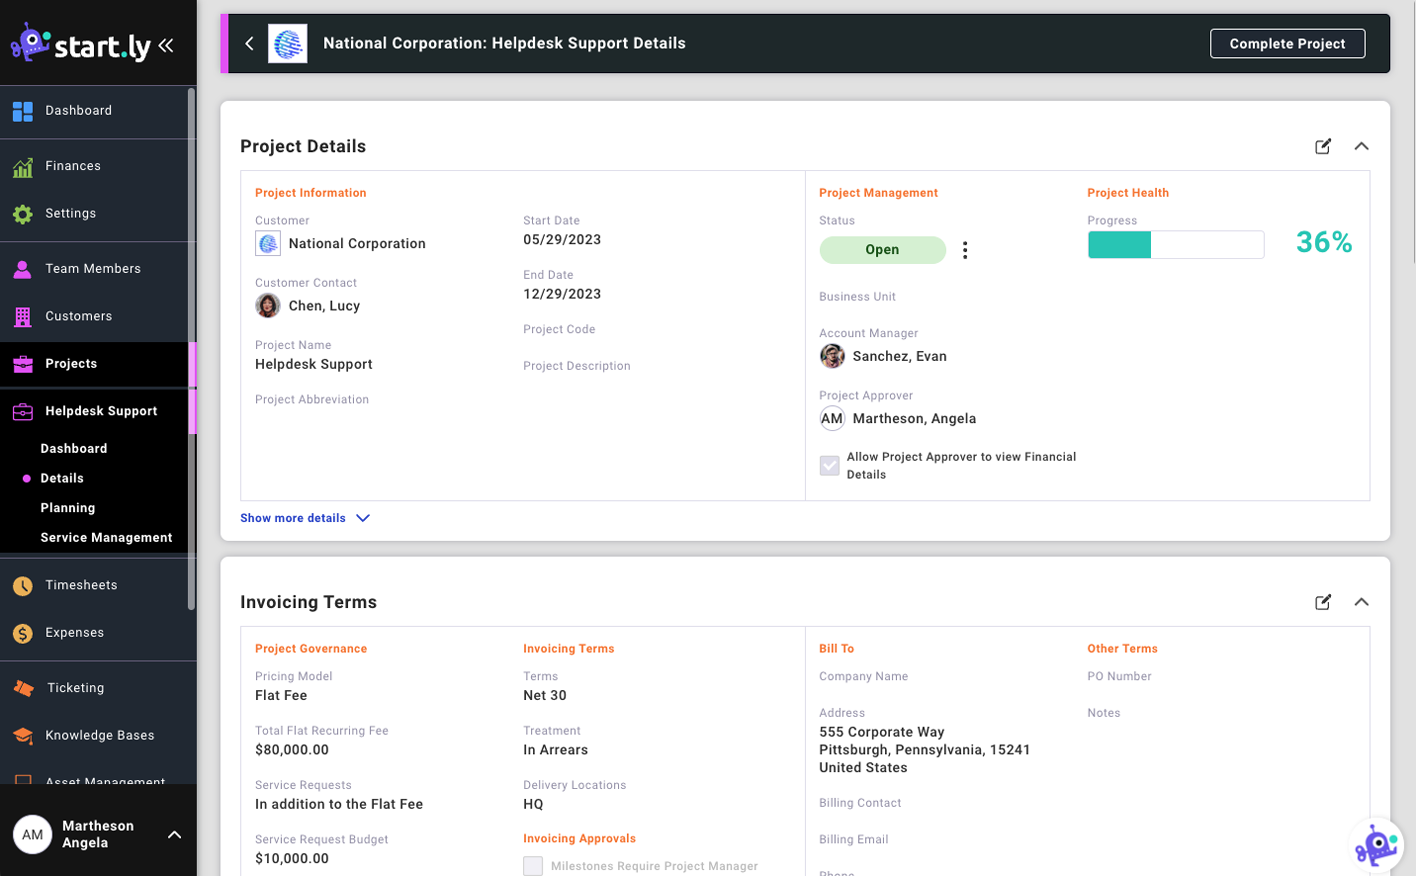
Completing a Project
To close a project, go to the Project Details screen and select the Complete Project button in the upper right corner.
When completing a Project, you can provide the Completion End Date for the project and a closing reason. Timesheets and expenses can continue to be submitted up to the Completion Date.
A completed project cannot be re-opened.