Service Management Settings Card
The Service Management Settings card allows you to configure your project’s service management features–to meet your Ticketing, Asset Management and Change Management needs.
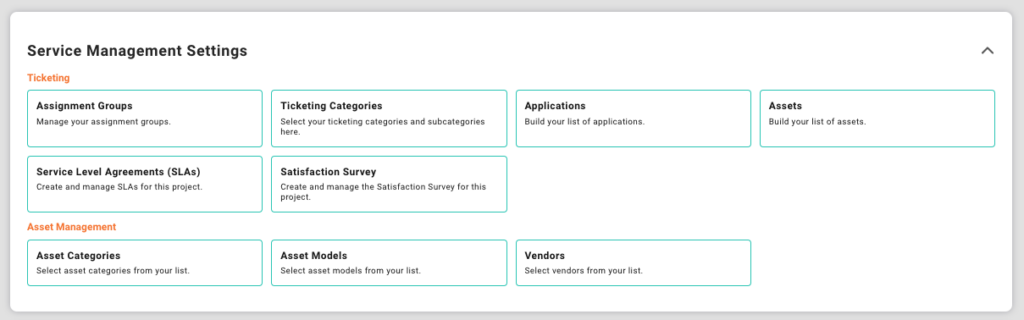
Startly allows your organization to define service management settings at either the global level (and therefore available to all of your projects) or at the customer level (and therefore can be reused across multiple projects for a single customer). Once they are established (globally or at the customer level), you can use this Service Management Settings card to selectively adopt the settings you want to apply to this project. These project-level settings include:
- Assignment Groups
- Which global or customer-level defined Assignment Groups do you want to respond to ticketing, asset management and/or change management requests? Use this feature to define this list.
- Ticketing Categories
- You can specify the ticketing category list that a ticket can be assigned to. This provides you with high-value reporting by category and sub-category.
- Custom Lists
- You can customize up to 2 additional lists to allow each ticket can be further categorized for reporting purposes, if desired.
- Service Level Agreements
- You can select from SLA Templates (created in Ticketing Settings) or create a custom SLA for this project.
- Satisfaction Survey
- Create and manage the Satisfaction Survey for this project. This survey will be sent when a submitted ticket has been closed by a fulfiller. Make sure to check the “Send Survey When Closed” checkbox in the Service Management section of the Project Details.
Service Level Agreements (SLAs)
Adding a Service Level Agreement
Create SLAs for projects to help define levels of service expected by your customers. Multiple SLAs can be created and active for an individual project.
- After selecting the SLAs setting, select the plus icon to add a new SLA to this project.
- Make the SLA active.
- Select from SLA templates if they are available.
- Templates are created by admins in the Ticketing settings of Startly.
- Templates can be selected as a starting point for a custom SLA.
- Selecting a template is optional and not required.
- Enter a Description for the SLA.
- Select End User Types:
- All – All End Users that submit a ticket on this project.
- VIP – End Users defined as VIP that submit a ticket on this project.
- Standard – End Users not defined as VIP that submit a ticket on this project.
- Select Ticket Types:
- All
- Incident
- Service Request
- Problem
- Select a Service Window:
- Available Service Windows are defined in the Service Window setting.
- Assignment Groups can be added to the template or at the project level.
- Ticketing Categories can be added to the template or at the project level.
- Manage SLA Notifications:
- Enable notifications for SLAs based on percent of time remaining (Less than 50%, Less than 25%) or a breach of an SLA.
- Define recipients for each enabled notification.
- Define Service Time Agreements:
- Select any of the services; First Response, Team Member Assignment, First Response After Assignment, Periodic Update, On Hold Update and Resolution.
- Enter values for Critical, High, Medium and/or Low for each selected service.
- Each value can be defined in minutes, hours, or days.
- By default, when a service time agreement is selected the option to Allow Notifications is selected. Uncheck Allow Notifications to turn off notifications for an individual service time agreement.
- To turn off notifications for an individual service time agreement uncheck Allow Notifications.
Satisfaction Survey
Creating a Satisfaction Survey
Satisfaction Survey’s are a powerful tool when it comes to feedback and understanding on the quality of service you are providing your clients. Startly allows each ticketing project to have a Satisfaction Survey created and sent when a ticket is closed. Here are the 3 quick steps to creating the survey:
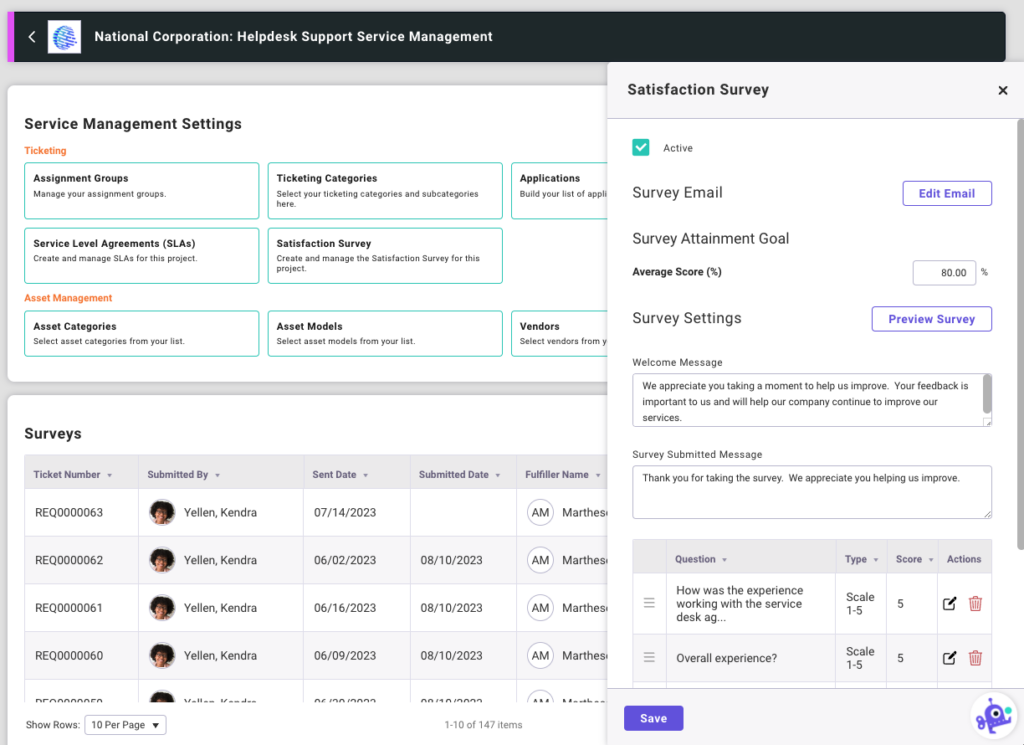
Make the Survey Active
Checking the Active checkbox will make the survey active. This survey will be sent to customers when a ticket is closed.
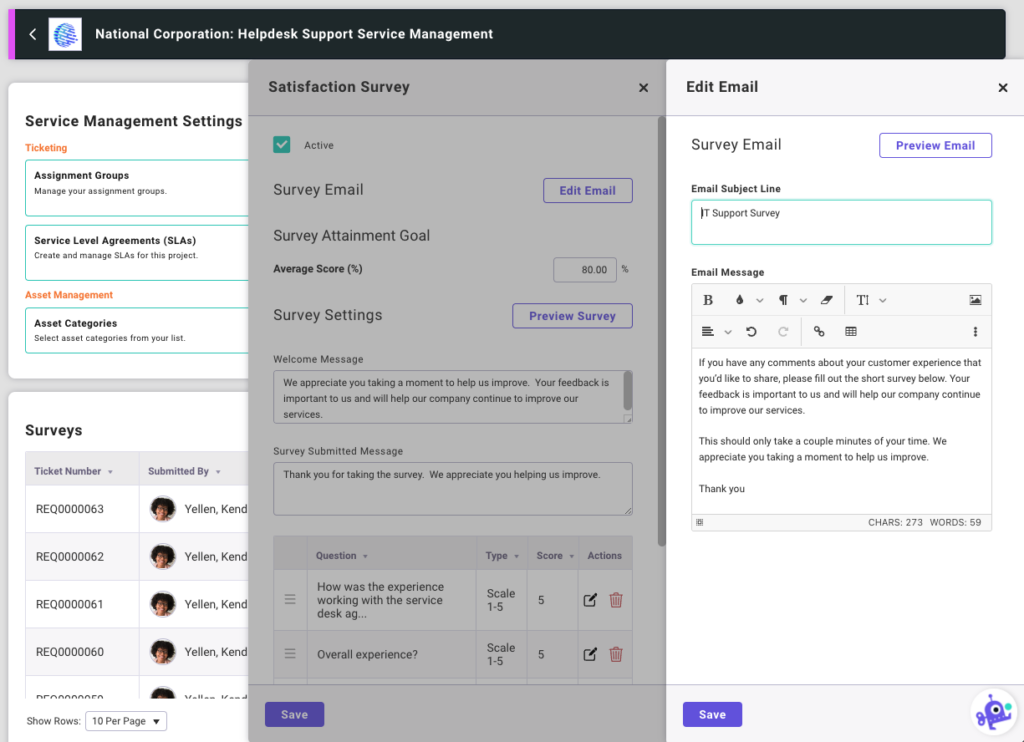
Edit the Email
Customize the subject line and body of the email sent to your end users when a ticket is resolved and closed. By default a general subject line and body for the email will be used as is if no edits are made.
Create the Survey
Create your Satisfaction Survey for this project by entering a Welcome message, a Survey Submitted message and adding questions for user feedback. Choose from 3 question types A/B, Scale 1-5 or Text, and add as many questions as you need to get the right feedback and insights from your customers.
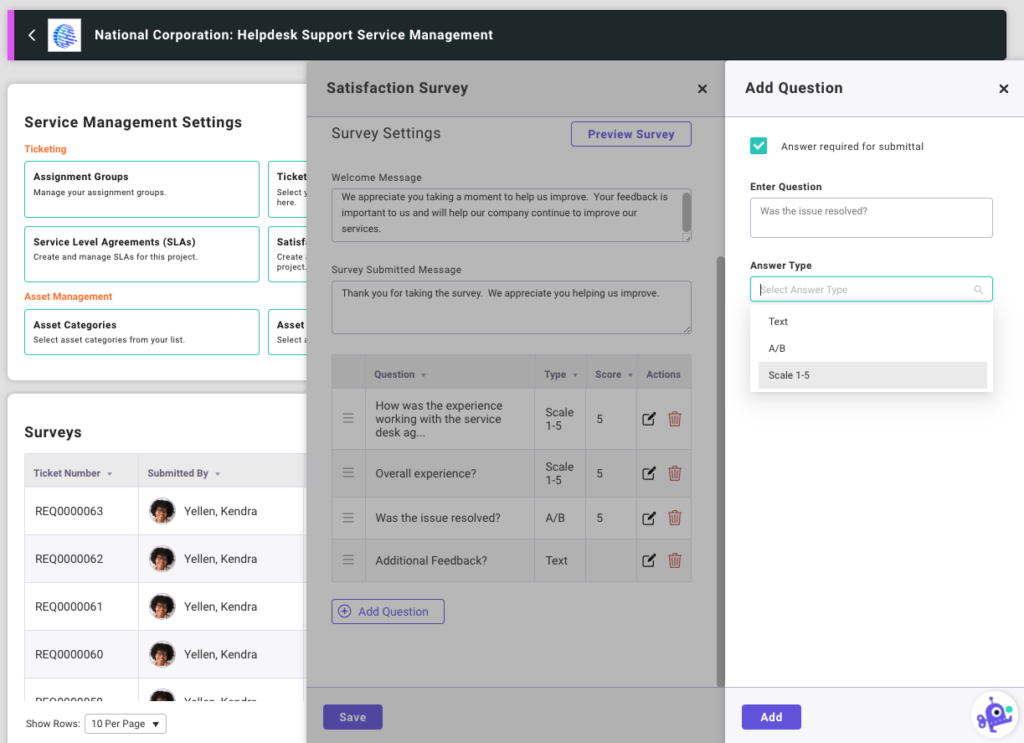
- Text
- Select Text answer type when you want an opinion or custom answer from your question. Text answer types are not scored.
- A / B
- Select A/B answer type for Yes or No, True or False questions.
- Scale 1-5
- Select Scale 1-5 answer type to provide a scale of Very Satisfied to Very Dissatisfied to select from.
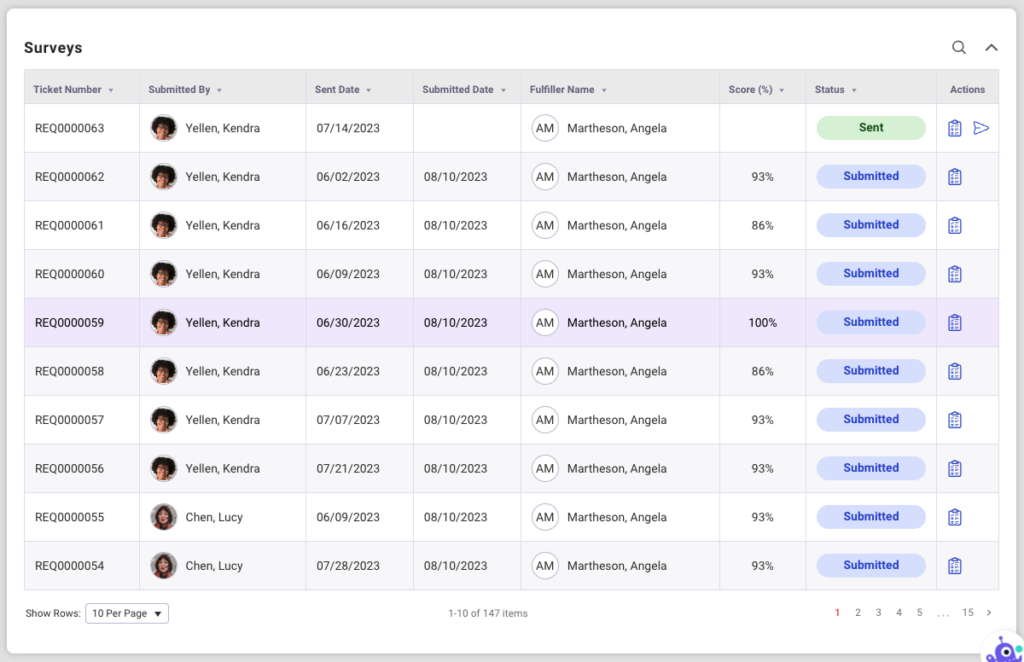
Surveys Card
View all sent surveys for this project. Each sent survey will become a line item in this table showing important information about who submitted the survey, when it was sent and submitted as well as the score and a link to view the survey answers.