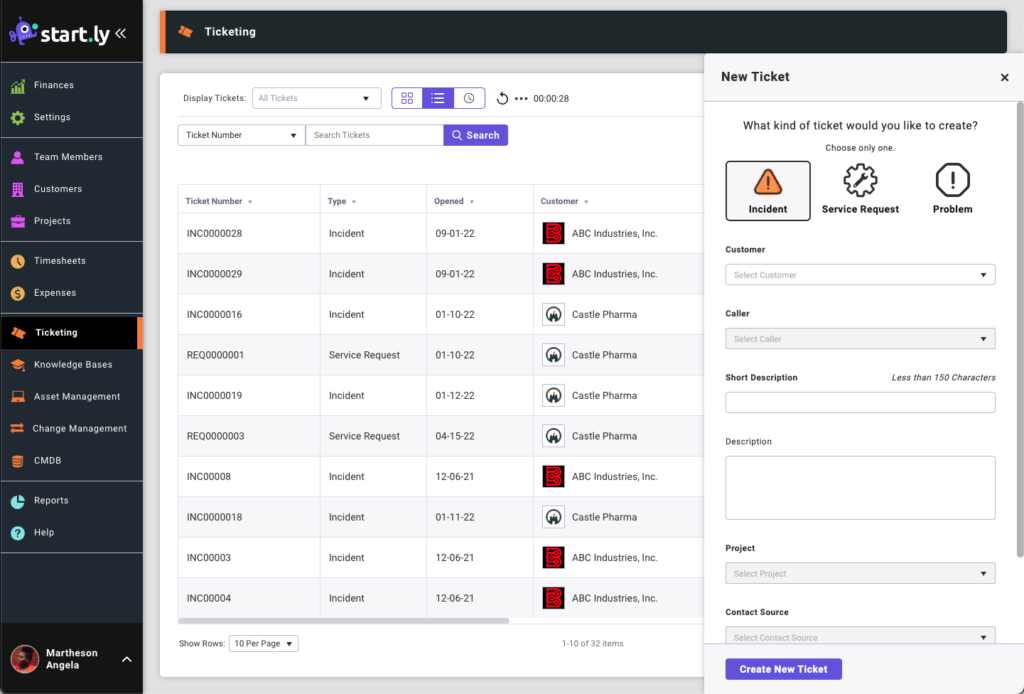
New Tickets
Select the New Ticket button on the Ticketing List screen to create a new ticket.
For Incidents and Service Requests the required fields include:
- Choosing whether to create a new Incident or a new Service Request
- Customer
- Caller: the end user initiating ticket
- Short Description
- Project
- Contact Source
- Assignment Group
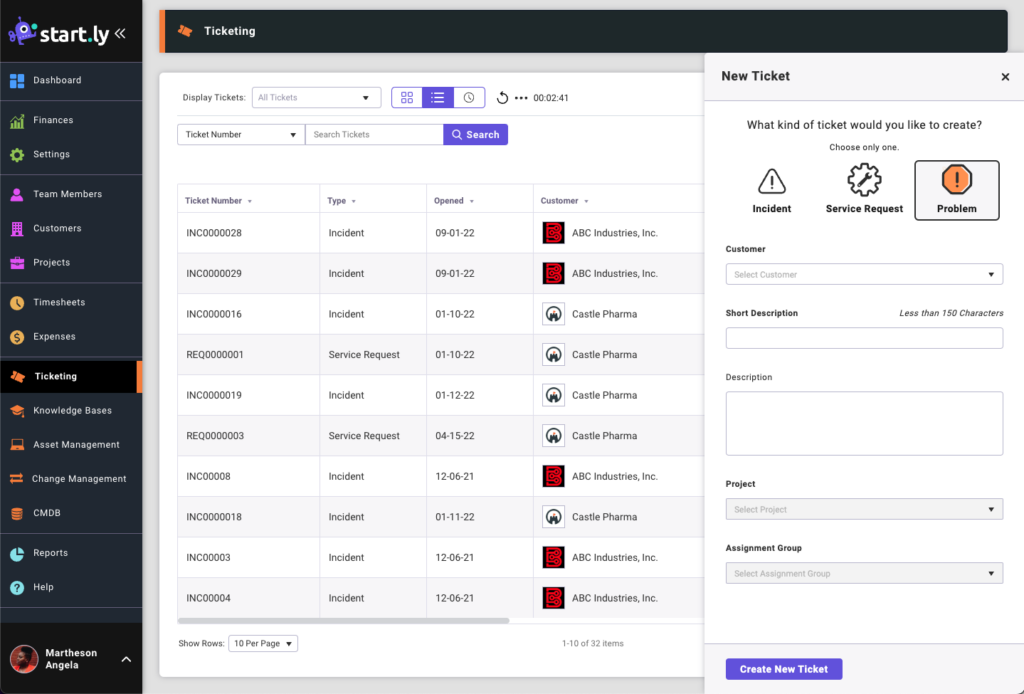
For Problems the required fields include:
- Select Problem
- Customer
- Short Description
- Project
- Assignment Group
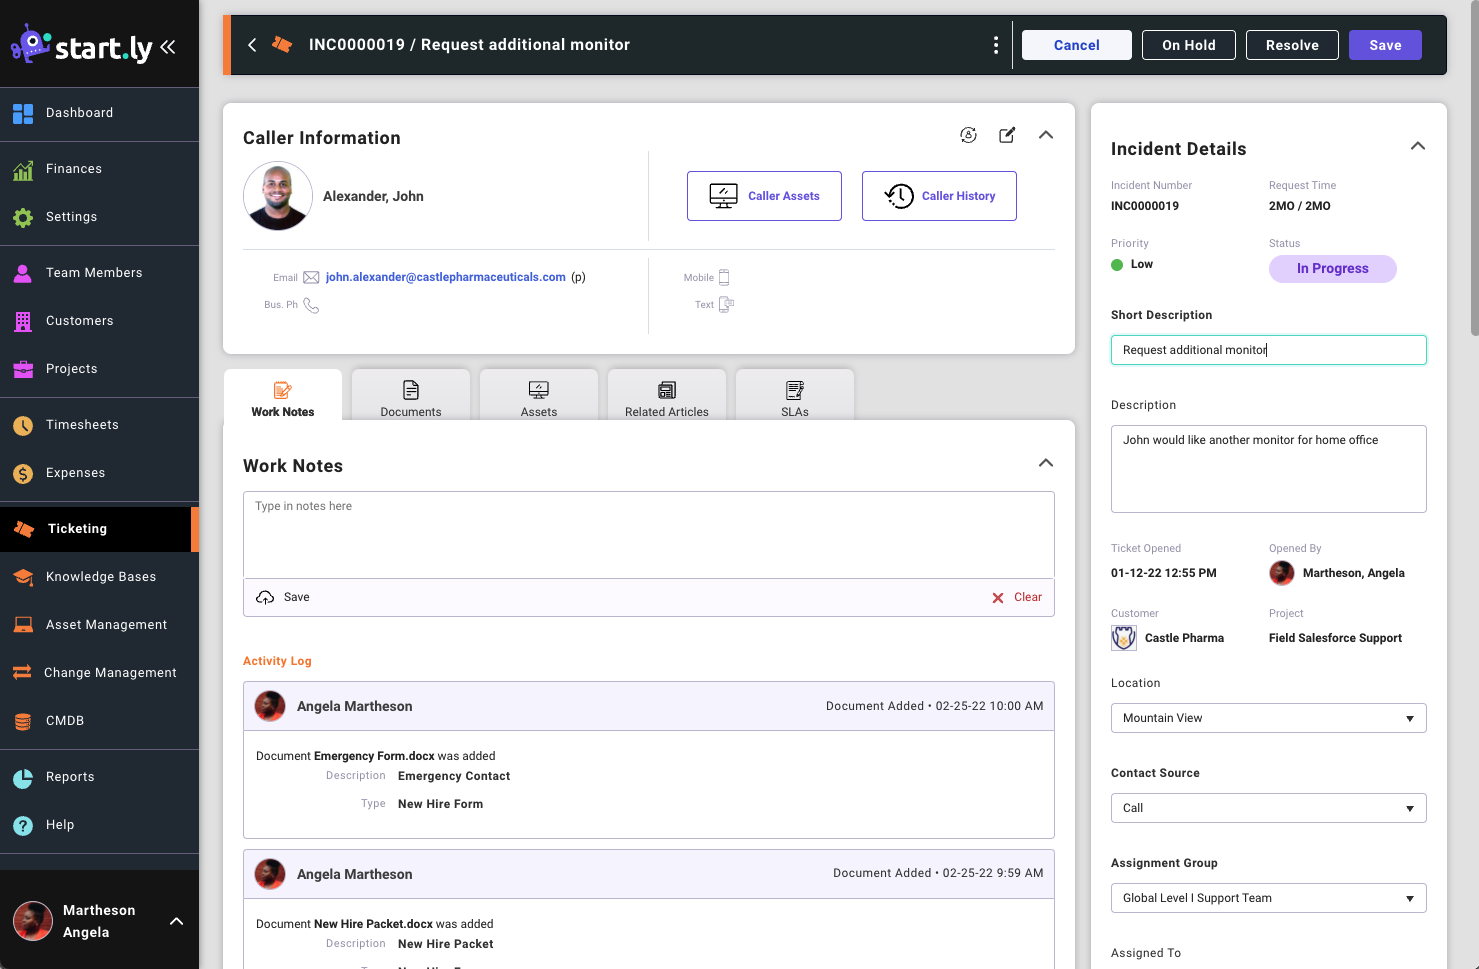
Once you select the Create Ticket button, you are directed to the Ticket details screen to further manage this ticket.
Managing an Incident or Service Request
The Ticket detail screen allows you to manage a ticket to resolution. From the Ticket detail screen you can:
- See Caller details
- Provide Work Notes
- Attach Documents
- Search for and affiliate Related Articles
- Review Service Level Agreement (SLA) statistics
- Change Assignment Group
- Change the assigned Team Member supporting the ticket
- Update the Impact and Urgency. The Priority of a ticket is derived from the Impact and Urgency
- Assign a Category and Sub-Category
- Assign values for the Custom Lists
- Associate the ticket to a Problem or a Service Request
- Change the ticket Status (On Hold, Resolved). These buttons are in the upper right corner of the Ticket detail screen
Ticket Status
As you progress a ticket from inception to completion, the ticket Status will be automatically updated based on various conditions. The possible status settings are:
- New/Unassigned
- A new ticket that has not been assigned to an Assignment Group member.
- Assigned
- Ticket has been assigned to an Assignment Group member.
- In Progress
- Ticket information has been updated (for example, a Work Note has been created).
- On Hold
- The clock for elapsed time for this ticket is suspended while a ticket is On Hold.
- Customer Reply
- The Caller has emailed a reply to this ticket.
- Resolved
- The ticket has been resolved by the assigned Team Member, and is pending confirmation of resolution.
- Closed
- Ticket is marked as closed/completed. Resolved tickets are automatically Closed after 3 days.
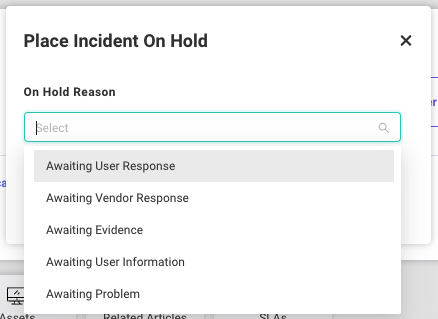
Placing Tickets on Hold
Placing a ticket on hold suspends the service level performance clock. To place a ticket on hold:
- Select a ticket from the Ticket List screen to view a ticket details
- Select the On Hold button in the upper right corner
- Choose an On Hold Reason to complete the form
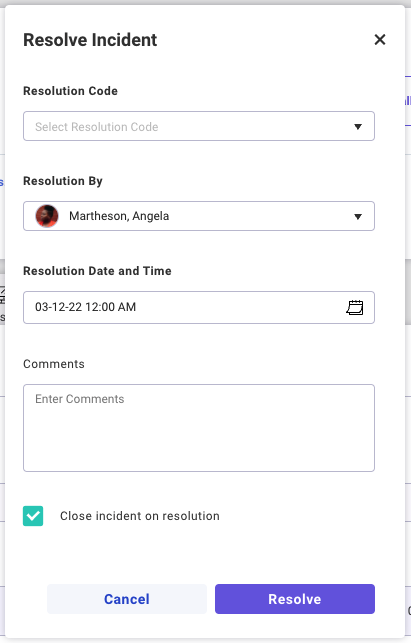
Resolving a Ticket
When you have completed a ticket it is considered resolved. To resolve a ticket:
- Open the ticket from the Ticket List
- Select the Resolve button the upper right corner of the Ticket detail screen
- Complete the Resolve Ticket form
- Choose the Close ticket on resolution option to close the ticket. Otherwise, the ticket status will be changed to Resolved (Resolved tickets can be manually closed at a later date. Otherwise, resolved tickets are automatically closed after 3 days).