Prior to creating Configuration Items in Startly, you will need to manage Configuration Item Types and Configuration Item Icons in the CMDB settings.
Configuration Item Icons
Configuration Item Icons are required when adding Configuration Items Types to use in your CMDB. Configuration Item Icons are also used to give a visual identity to Configuration Items in the relationship map on a Configuration Item detail page.
Add & Manage Configuration Item Icons
- Select the Actions menu of the configuration item icon row and choose Edit Configuration Item Icon
- Edit the Configuration Item Icon name
- Change the icon image
- Make an icon inactive by unchecking the active checkbox
- Save the changes
Configuration Item Types
Configuration Item Types are required and can be selected when adding Configuration Items to your CMDB. Configuration Item Types also contain custom attributes which can be required for each new Configuration Item.
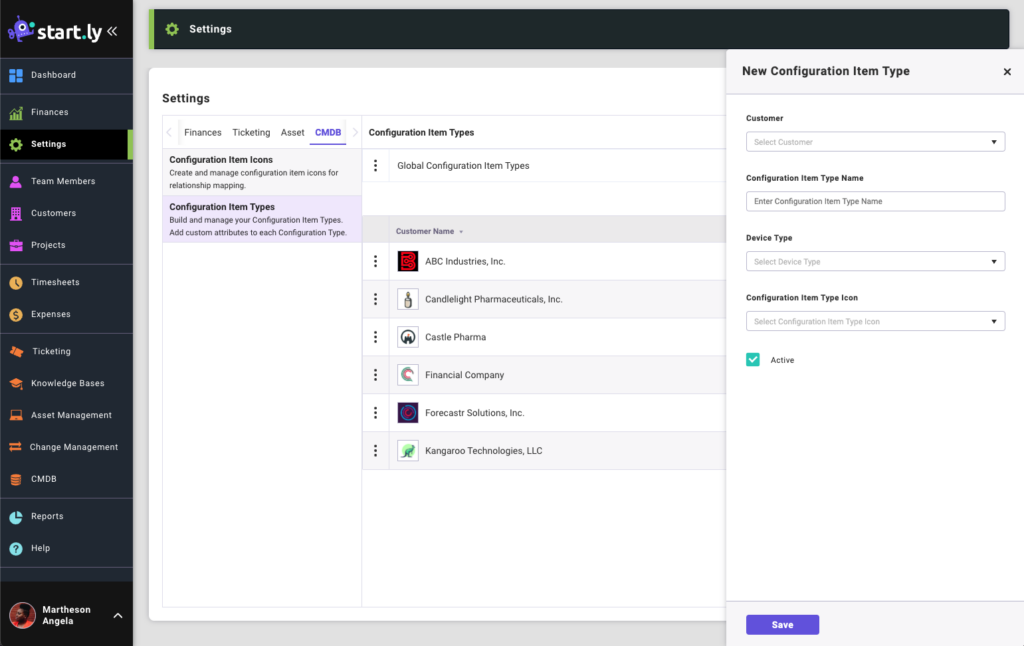
Creating New Configuration Types
- Select the Add Icon to create a new Configuration Item Type
- Select a customer
- Selecting Global will make this Configuration Item Type available for all customers
- Selecting a specific customer will make this Configuration Item Type available only for the selected customer.
- Enter a name for this Configuration Item Type
- Select a device type
- Virtual is something that is emulated, such as a virtual server
- Physical is an actual device or piece of hardware, such as a hard drive
- Select a Configuration Item Type Icon
- Make sure to use the Configuration Item Icon setting to add icons to populate this drop down menu
- Save the type
Configuration Item Type Attributes
Additional details can be added to each Configuration Item Type in the form of Attributes. These Attributes will be available on the Configuration Item detail page and can be required fields for entry.
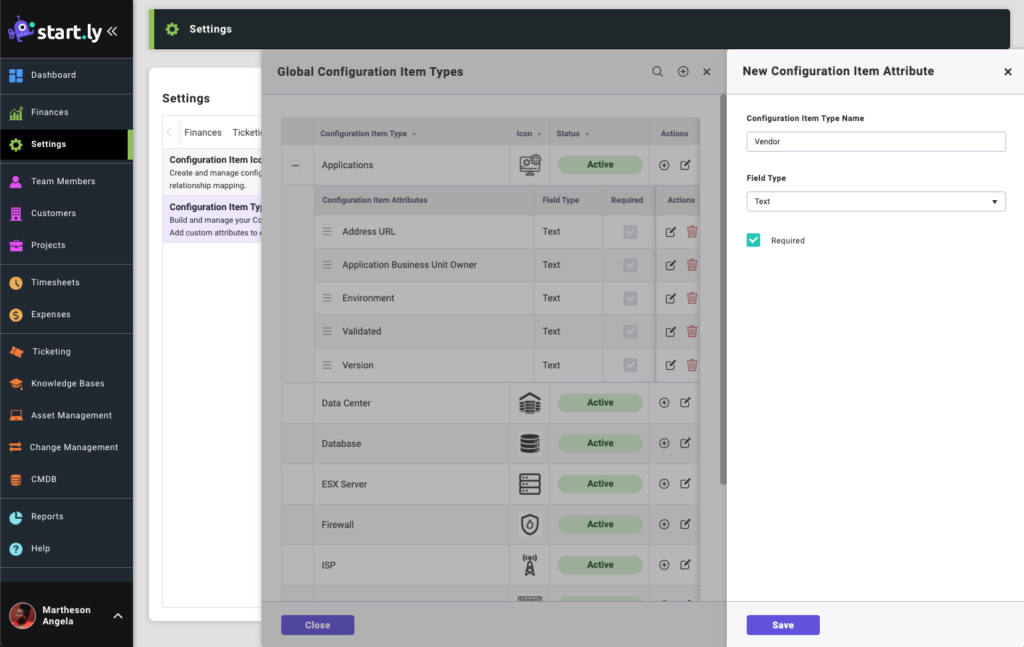
Creating Configuration Item Attributes
- From the Configuration Item Type list select the Add Icon to add an Attribute
- Enter an Attribute name
- Select Field Type
- Check Required to make the field a requirement for this item