Startly allows each Team Members to track their time on projects or on internal organizational activities. To record time against a project, you must be actively assigned to the project and can only submit time between your assignment start and end date.
OVERVIEW You can also configure your account to define your timesheet policies for your organization. For example, you can define for whom timesheets are required, who can approve timesheets, which projects require approval, and whether each Team Member must enter comments associated with their time entries.
Submitting a Timesheet
Timesheets can be updated daily, but you must submit a timesheet for an entire week. To enter and submit a timesheet:
- Select the Timesheets menu.
- Choose the My Timesheet tab.
- The default timesheet week displayed is the current week. Use the calendar control in the upper right corner of the card to change the week, if needed.
- To add entries to your timesheet, choose either the Add Project Codes or Add Non-billable Codes buttons. Project Codes refer to projects that you are assigned to. Non-billable Codes refer to internal organizational categories for recording your time, such as “Holiday”, “Operations”, or “Sales”.
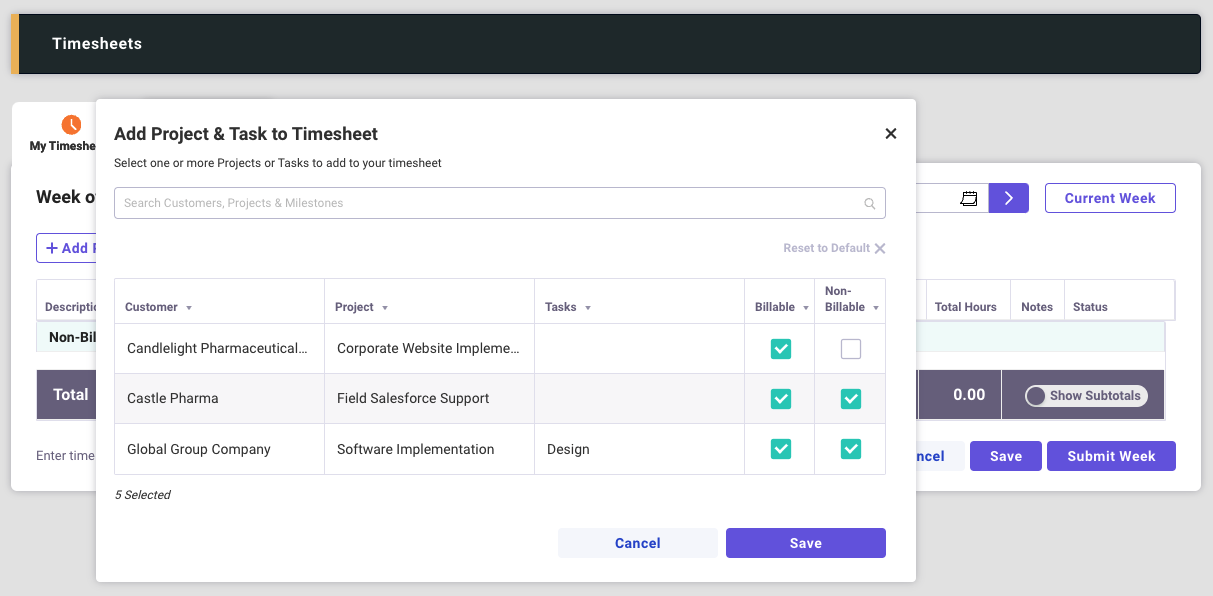
- Choosing the Add Project Codes displays a window of all eligible projects that you are assigned to. You can choose to add Billable and Non-Billable entries for these projects. This allows you to designate billable time against a project (on the Billable time entries) and also to record non-billable time against a project.
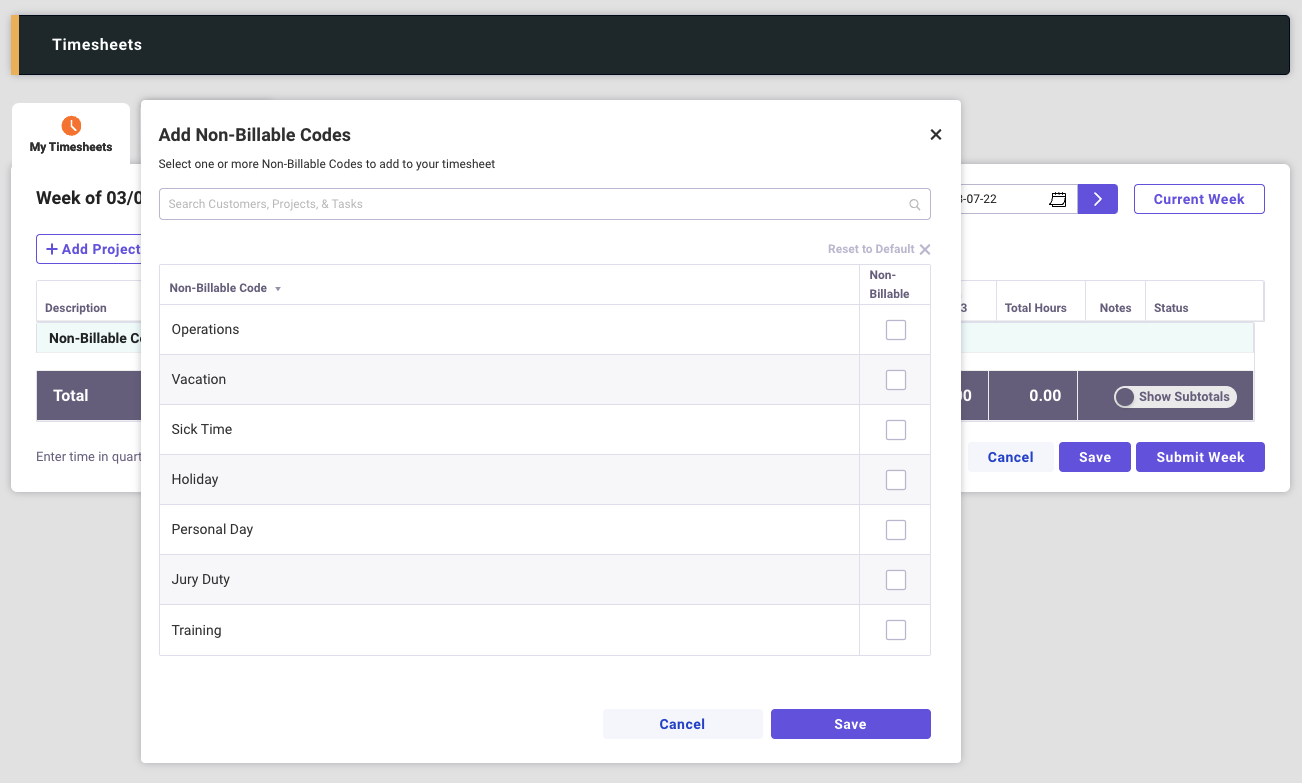
- Choosing the Add Non-billable Codes button displays a list of available internal organizational time entries. These entries are specified by your organization.
- For each row (entry) on your timesheet, you can now enter time for the week.
- The Notes icon displays whether comments are required or optional for each entry (row) in your timesheet, and whether you have entered a comment for each row.
- Your timesheet can be updated daily and saved each time. When the weekly timesheet is completed, choose the Submit Week button to complete the timesheet process for this week.
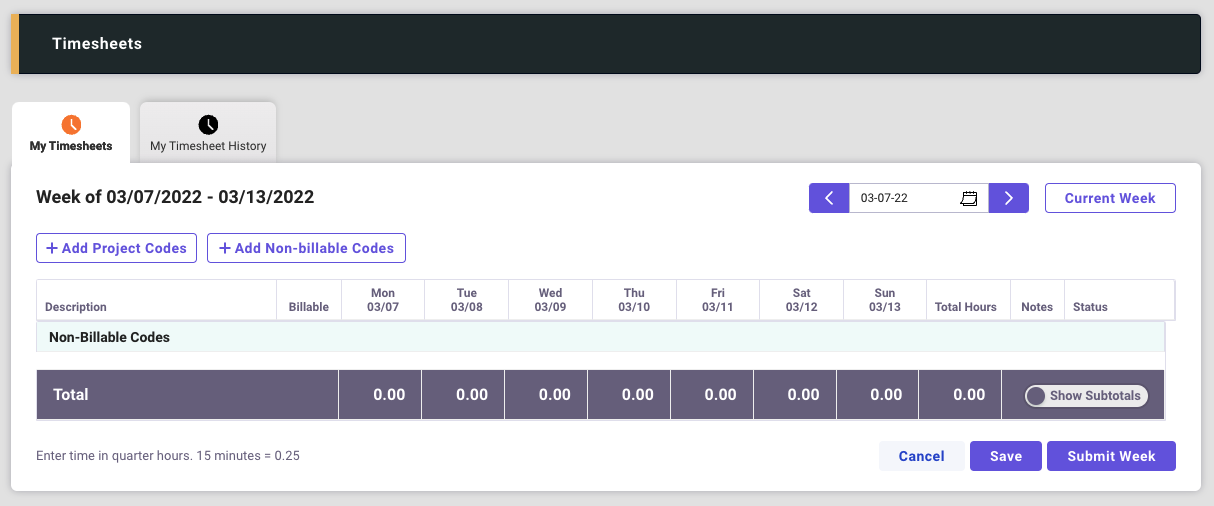
Displayed below is the Timesheet Week card, with the Calendar Control, the Add Project Codes button, the Add Non-billable Codes button, and the Submit Week button.
When choosing the Add Project Codes button, the window will display projects that you are assigned to that are eligible for time entry for the selected week. For projects that include Tasks, you must enter time at the task level. For projects without tasks, you enter time at the project level.
When choosing the Add Non-billable Codes button, the window will display a series of organizational time codes as defined for your organization.
When you submit your timesheet week, you will notice the status of the weekly timesheet changes to Submitted, and each timesheet entry (row) status changes to Submitted.
Project time entries are reviewed and approved by the Project Approver. Non-billable time entries are reviewed and approved by your manager. If a timesheet entry is rejected, you will receive a notification via email, and you will be able to return to this timesheet week and revise and re-submit this timesheet.
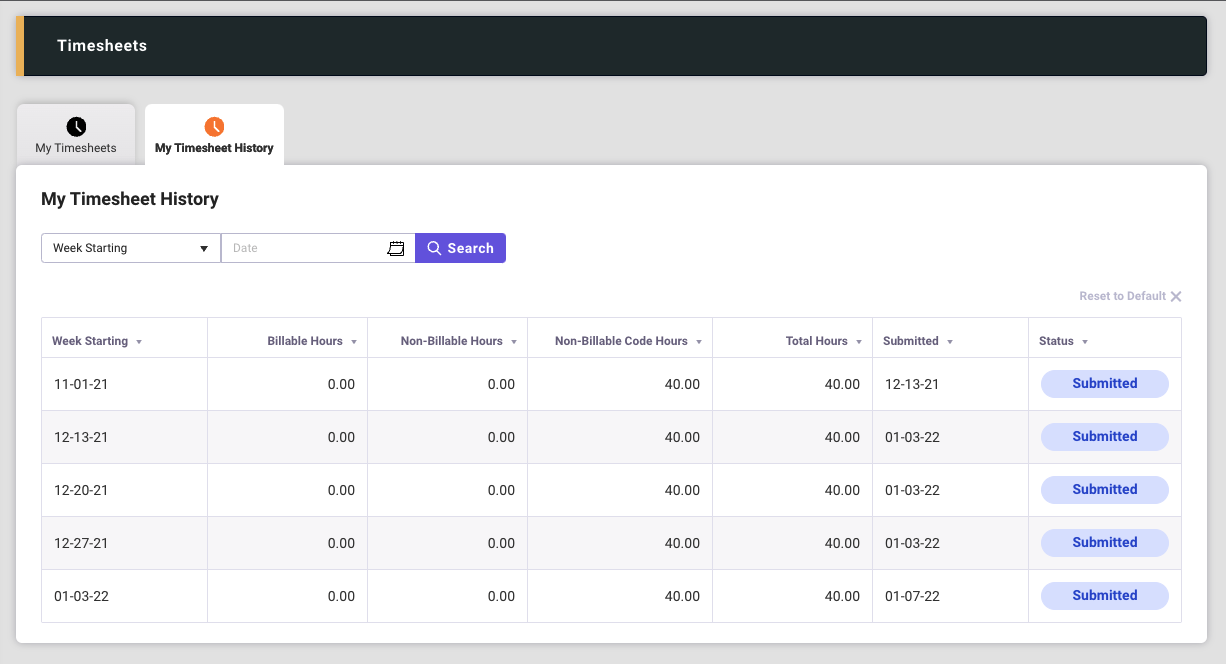
Timesheet History
The My Timesheet History tab displays the historical list of all of your timesheets. You can select any week to review that timesheet.