Startly was built with the goal of being easy to use and providing the operational controls needed to successfully manage your organization! Global Settings is home to configuration settings that apply globally to all Team Members, Customers and Projects within your account. It is also home to Customer specific settings to customize settings for any given Customer.
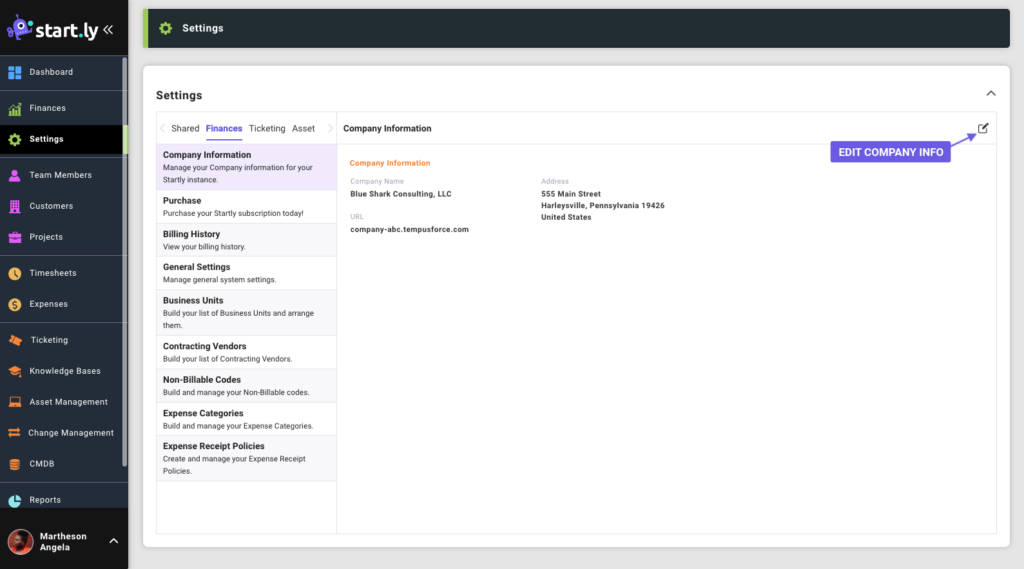
Company Information
Manage company information for your Startly instance.
Purchase
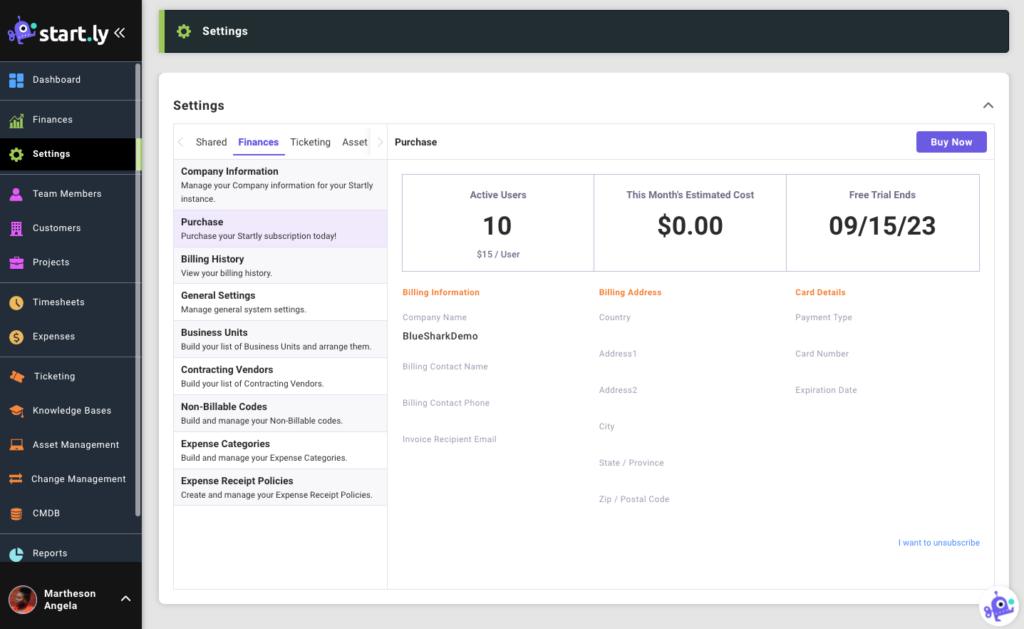
View and manage payment of Startly. View the number of active users as well as your estimated monthly cost and next charge date. Enter and edit payment information for your Startly subscription.
Billing History
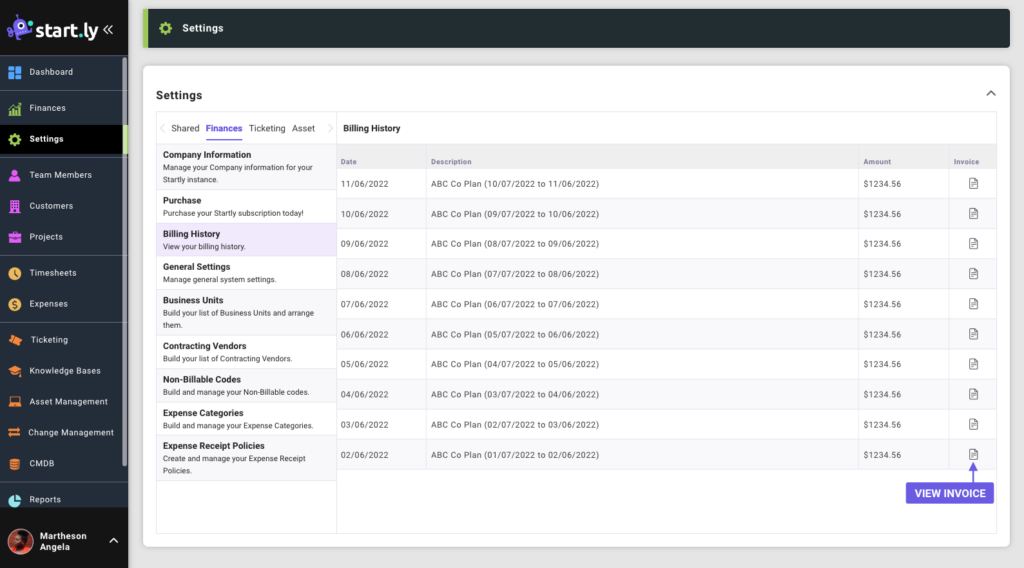
View your monthly billing history and download past invoices for your Startly subscription.
General Settings
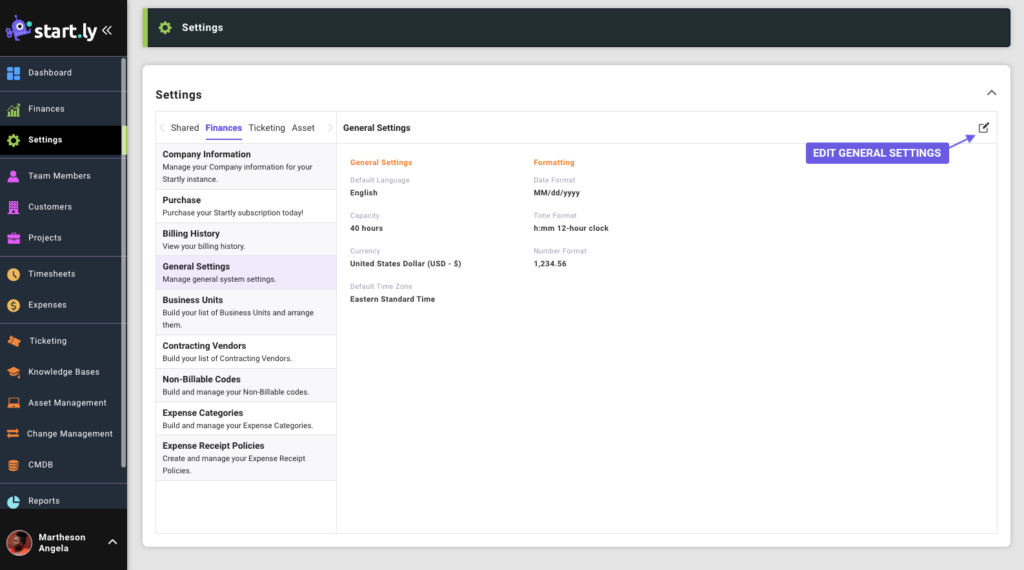
Manage general system settings for your instance. These settings will be the default settings for new users when added to your instance. Each user has the ability to personalize their own experience by changing formatting, language and time zone settings to their liking.
Business Units
You can define your internal organization structure with Business Units. By assigning Business Units to Team Members and Projects, admins can use reports to see profitability and utilization insights by Business Unit.
- Global Business Units
- Business Units defined under the Global Business Units section are available for selection on all Projects for all Customers.
- Customer Business Units
- Custom Business Units can be defined for each Customer by selecting the Customer name. Business Units defined at the Customer level will only be available for selection on that Customer’s Projects in Startly.
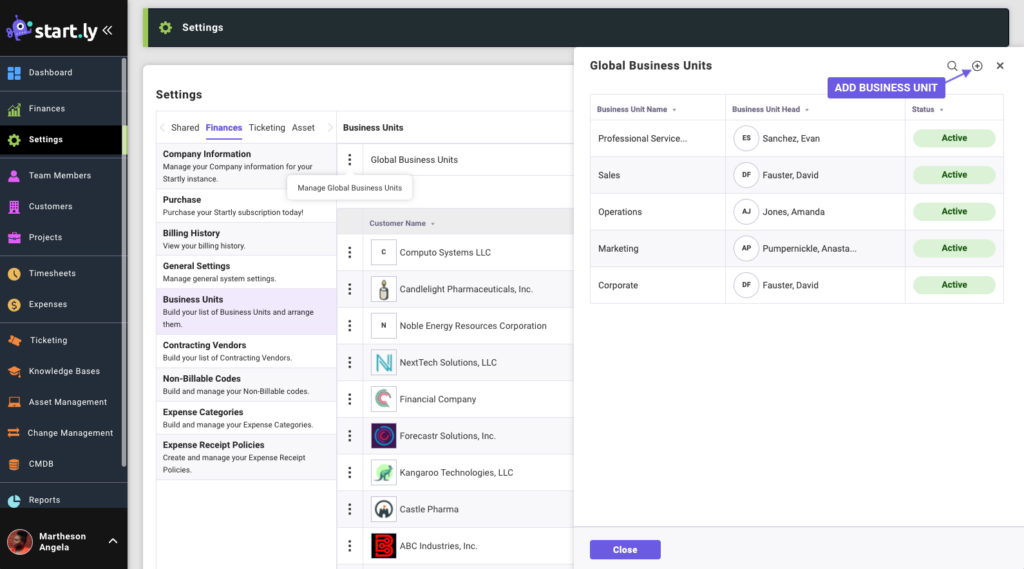
Add a Global Business Unit
- Select Manage Business Units from the Action Menu for the Global Business Units or any Customer listed.
- Select the Plus Icon to Add a new Business Unit.
- Enter a Business Unit Name.
- For Global Business Units, select a Business Unit Head.
- Save the Business Unit.
Contracting Vendors
You can add contractors as Team Members to your Startly account. If you want to report on activity by vendor, define your Contracting Vendors here, and associate those Team Members to their corresponding Contracting Vendor.
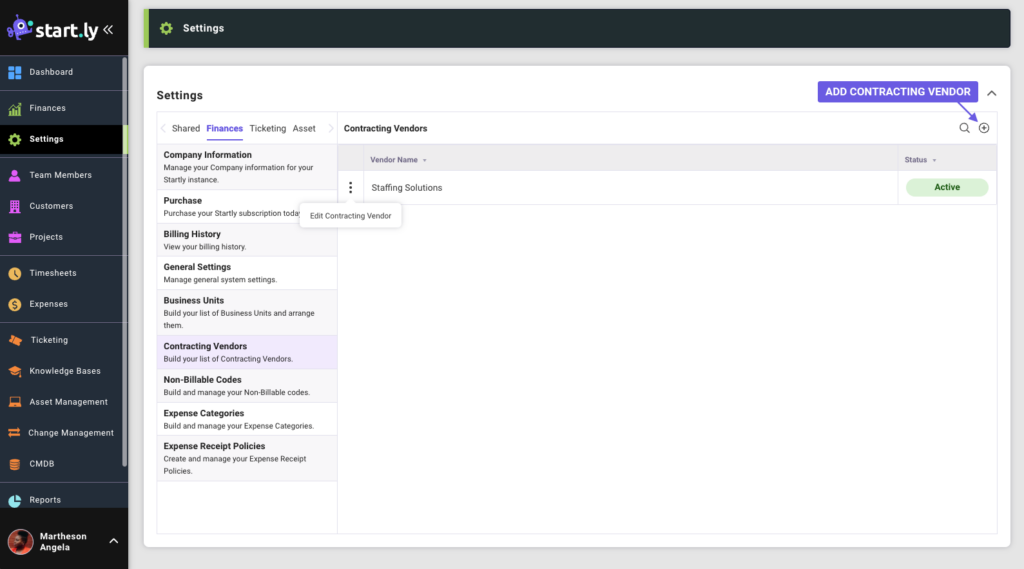
Add a Contracting Vendor
- Select the Plus Icon to Add a new Contracting Vendor to use throughout your instance.
- Enter a Contracting Vendor Name.
- Save the Contracting Vendor.
Non-Billable Codes
Also for Team Members who enter weekly Timesheets, this feature allows you to define non-billable entry types for your Team Members to record non-billable time. Examples include “Holiday”, “PTO”, “Vacation”, “Jury Duty”, and “Training”.
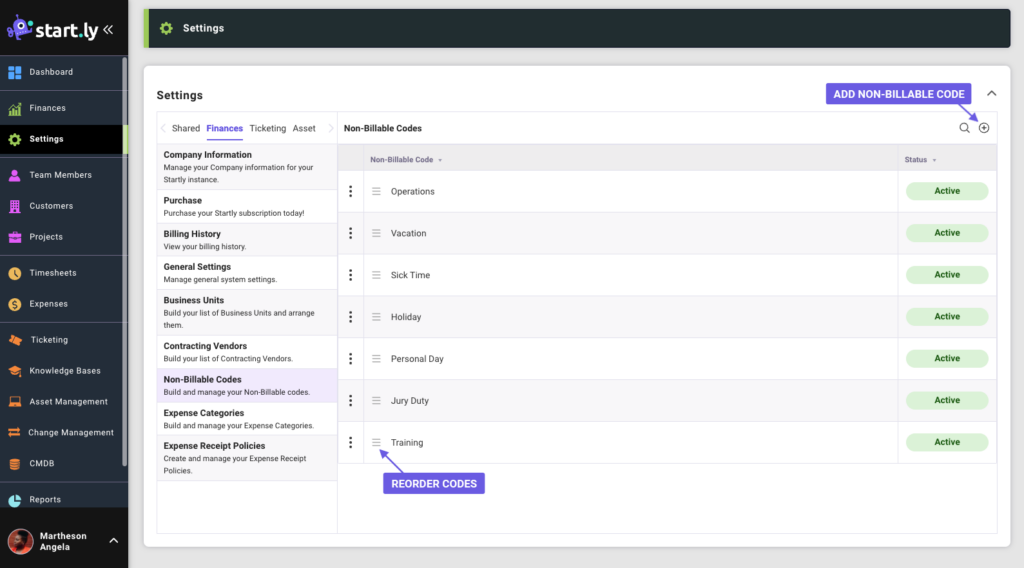
Add Non-Billable Codes
- Select the Plus Icon to Add a new Non-Billable Code to use throughout your instance.
- Enter a Non-Billable Code Name.
- Save the Non-Billable Code Name.
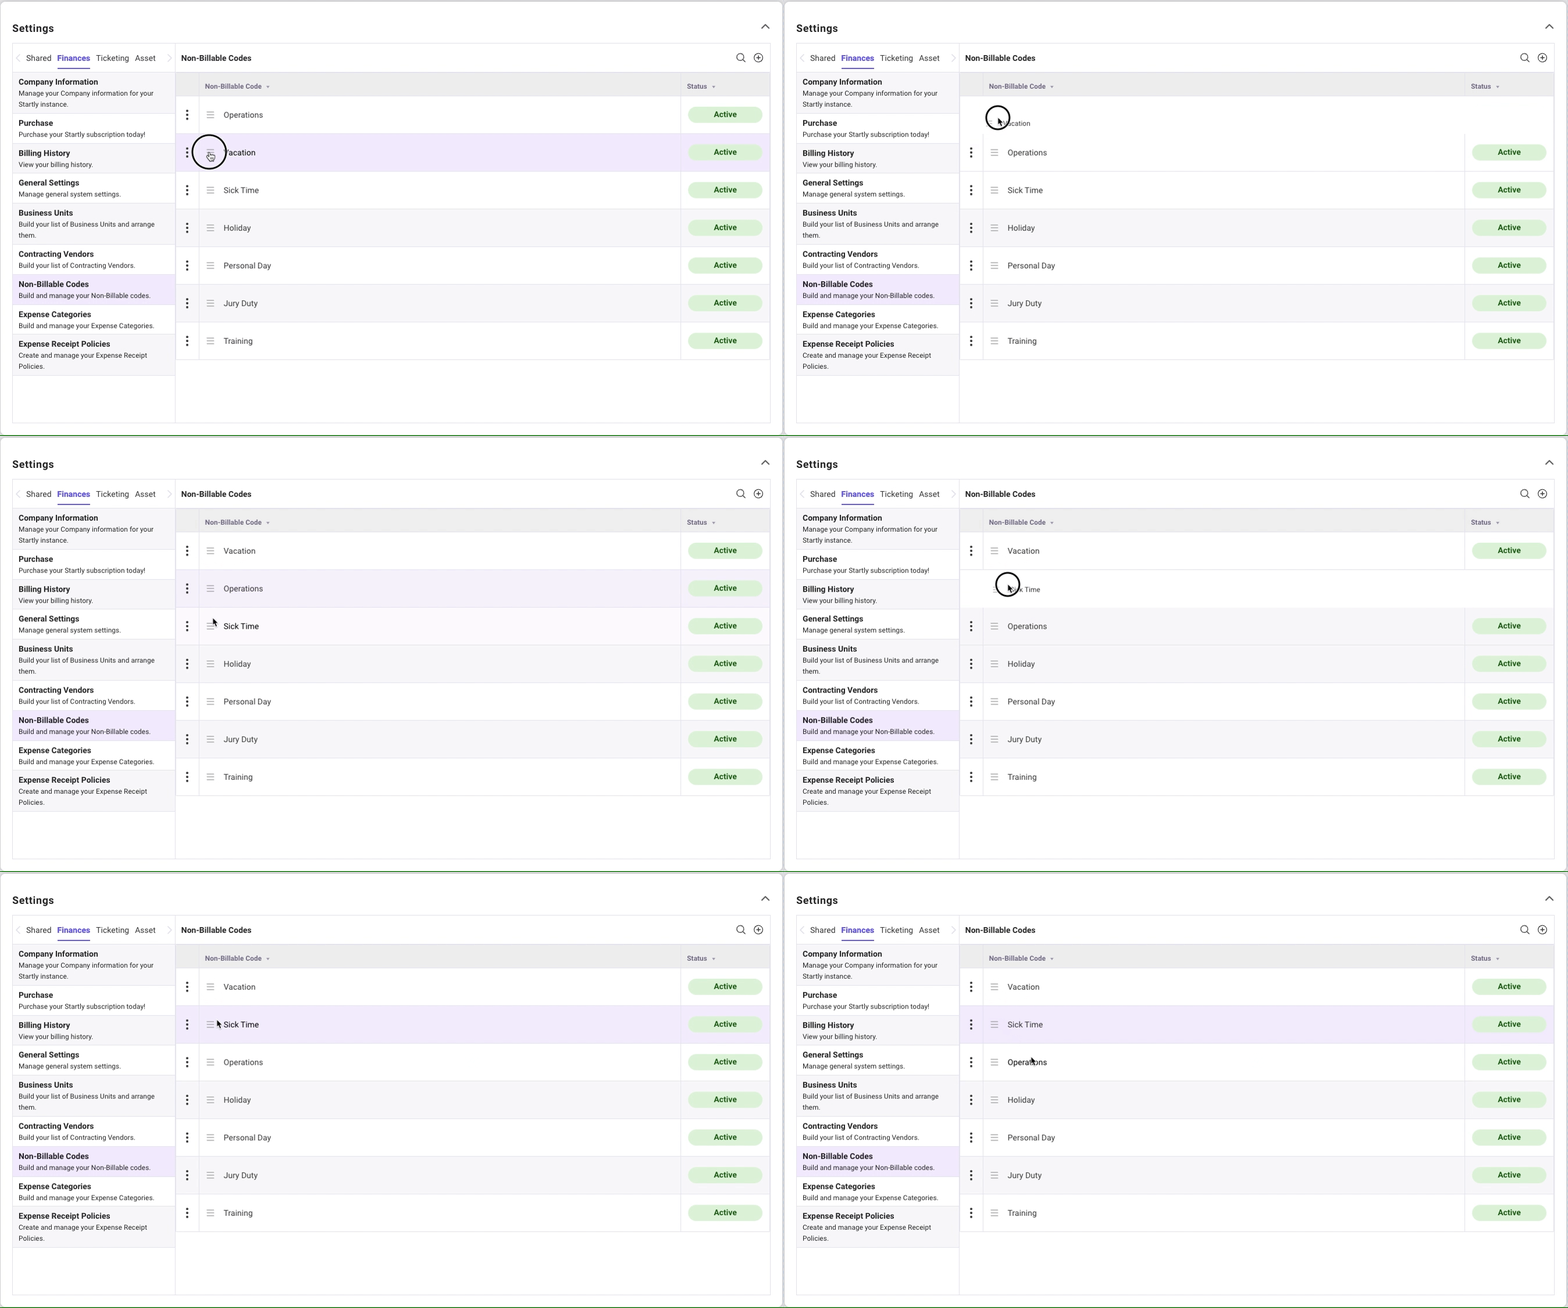
Sort Non-Billable Codes
When selecting Non-Billable codes on a timesheet, they will appear to users in the order (top to bottom) as they appear in the Non-Billable Code setting. To reorder the codes, click the sort icon and drag and drop the code in your desired order.
Expense Categories
For Team Members who submit expenses, you can define the Expense types and allowable daily limits or caps. Expense caps are considered “soft caps”, in that a Team Member can exceed the cap–the approving manager will be notified that the cap was exceeded, but can approve the Expense nonetheless.
- Global Expense Categories
- Expense Categories defined under the Global Expense Categories section are available for selection on Expense submittals for all Customers.
- Customer Expense Categories
- Custom Expense Categories can be defined for each Customer by selecting the Customer name. Expense Categories defined at the Customer level will only be available when submitting an Expense on a Project for that Customer in Startly.
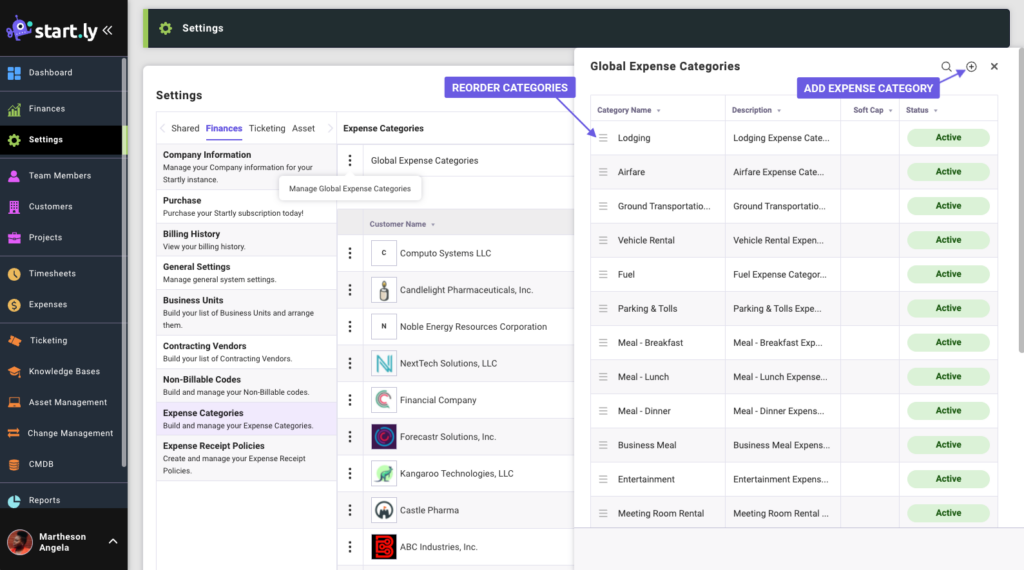
Create an Expense Category
Expense Receipt Policies
Define and enforce your expense reimbursement policy, including approval thresholds, receipt thresholds. You can specify your organization’s expense policies, as well as define your customer’s expense policies for customer reimbursable expenses. If a Customer specific policy is not created, that Customer will default to the All Customers Expense Receipt Policy.
Manage the All Customers Expense Receipt Policy
- Select Edit Expense Policy from the Action Menu for the All Customers Expense Policy.
- Turn the policy On or Off.
- OFF – By default the policy is set to off, which means receipts are not required for expenses.
- ON – By turning the policy on, receipts will be required for billable expenses.
- Set an Expense Receipt Threshold to manage when a receipt is required.
- To require receipts for all expenses, set a threshold of 0.
- Example: Setting a threshold of $50, will require receipts for all expenses more than $50. Anything under $50 in this example would not require a receipt.
- Save the Expense Receipt Policy.
Create a Customer Specific Expense Receipt Policy
- Select the Plus Icon to Add a new Customer specific Expense Policy.
- Select a Customer.
- Turn the policy On.
- Set an Expense Receipt Threshold to manage when a receipt is required.
- To require receipts for all expenses, set a threshold of 0.
- To not require receipts, set a threshold that is unlikely to be met, such as $1,000.000.00.
- Example: Setting a threshold of $50, will require receipts for all expenses more than $50. Anything under $50 in this example would not require a receipt.
- Save the Expense Receipt Policy.