Startly was built with the goal of being easy to use and providing the operational controls needed to successfully manage your organization! Global Settings is home to configuration settings that apply globally to all Team Members, Customers and Projects within your account. It is also home to Customer specific settings to customize settings for any given Customer.
Email Connectors
If you have a Project that is using the Ticketing feature and want your customer community to be able to email you to initiate a ticket, you can use this Email Connectors feature to associate a customer’s support email address with a Project to enable inbound email traffic to your Ticketing environment. For example, your Customer’s End Users can send an email to [email protected] and this email will be routed to Startly and arrive as a new Ticket for a defined project for your customer Global Group, Inc.
Create an Email Connector
- Select the Plus Icon to create a new Email Connector.
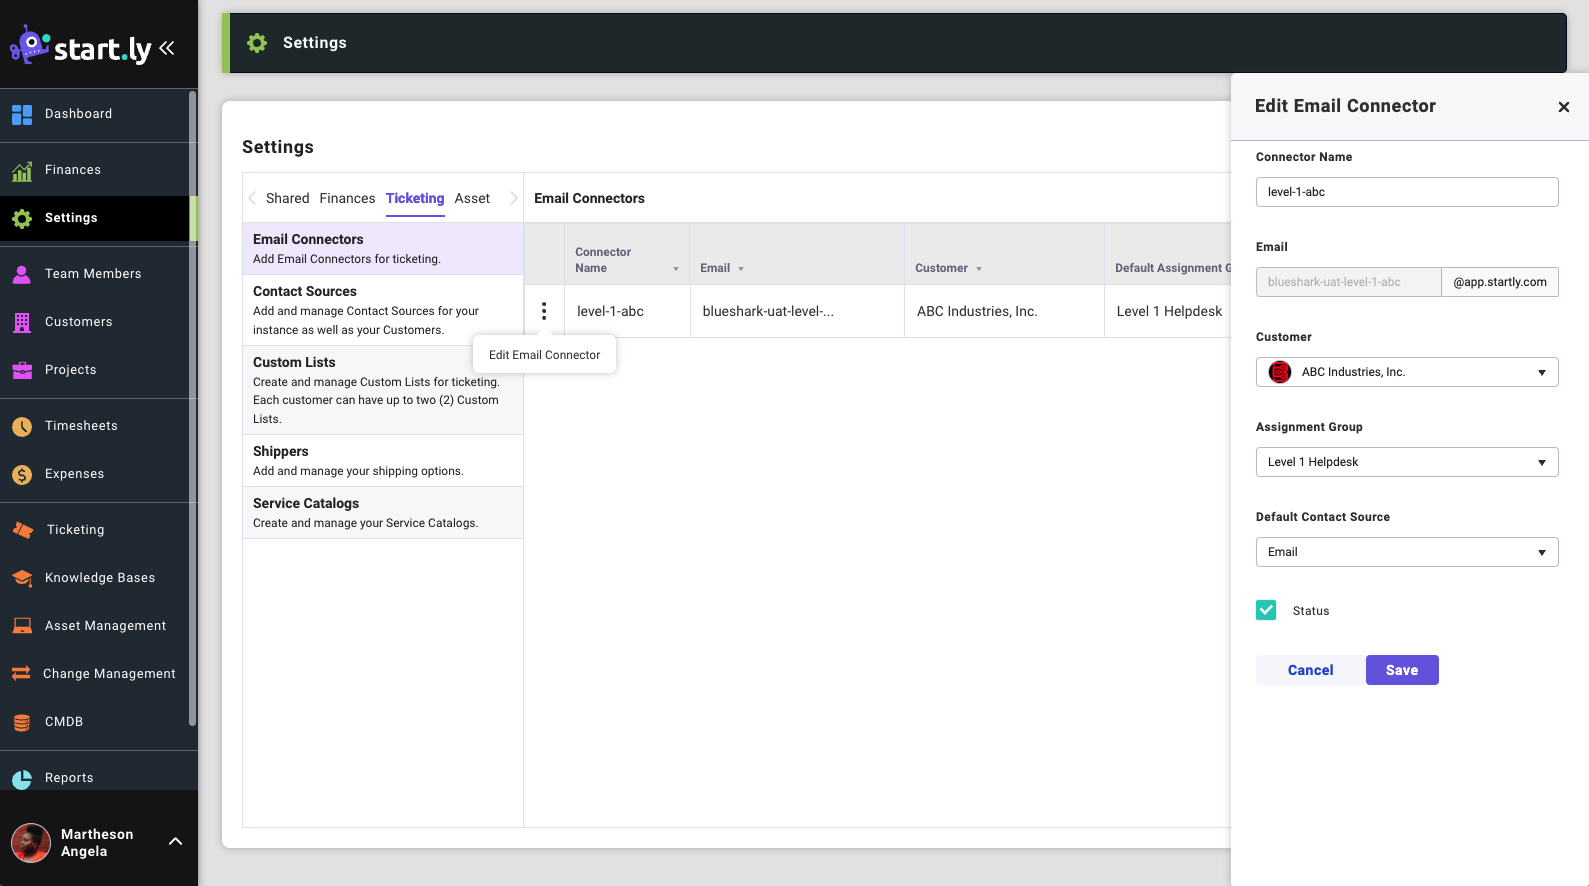
- Add a Connector Name.
- The Connector Name will be added to your instance name to create the email connector address. For example: If your instance name is Blueshark, and your Connector Name is Level 1, your email connector address will be:
- The Connector Name will be added to your instance name to create the email connector address. For example: If your instance name is Blueshark, and your Connector Name is Level 1, your email connector address will be:
- Select a Customer, Assignment Group & a default Contact Source.
- Save your details.
Contact Sources
You want to accurately document each of your Tickets for your supported Projects, including the various ways your customers are reaching you to initiate Tickets. The Contact Sources feature allows you to define the list of contact methods–the customer called our 1-800 phone number (“Call”), the customer emailed the support desk (“Email”), the customer came to our support location (“Walk In”).
Global Contact Sources
Setting Global Contact Sources allows common sources to be shared amongst all customers throughout Startly.
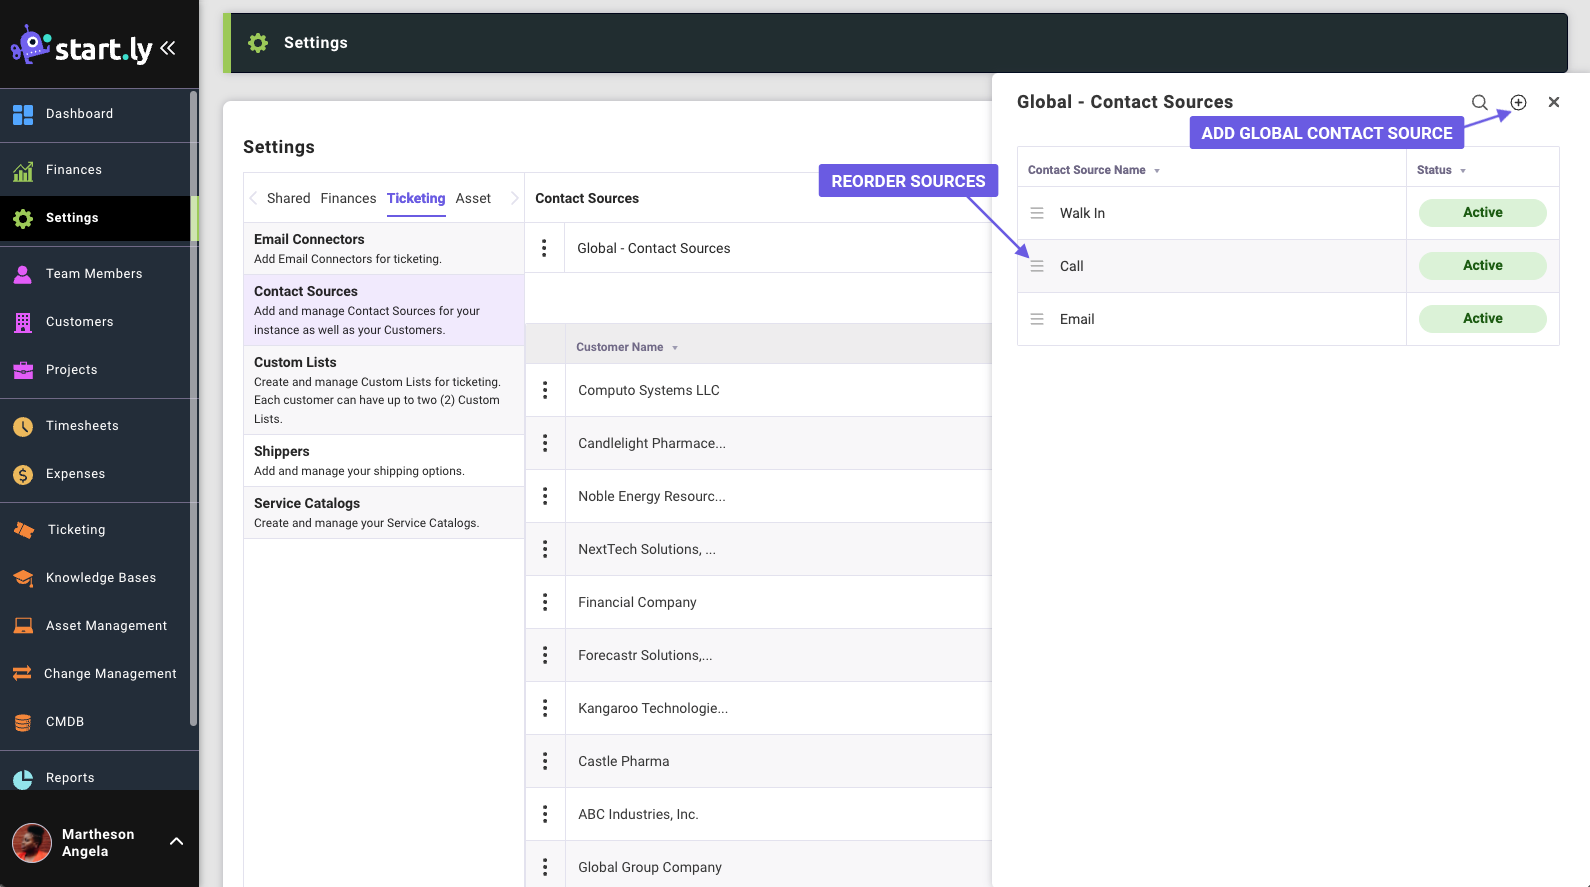
Create Global Contact Sources
- Select Manage Contact Sources from the Action Menu for the Global Contact Sources.
- Select the Plus Icon to add a new Global Contact Source.
- Enter a Contact Source Name.
- Save your New Contact Source.
Customer Contact Sources
At the Customer level, you can create Customer specific Contact Sources as well as select Contact Sources from the Global list to be available when documenting where this ticket was initiated.
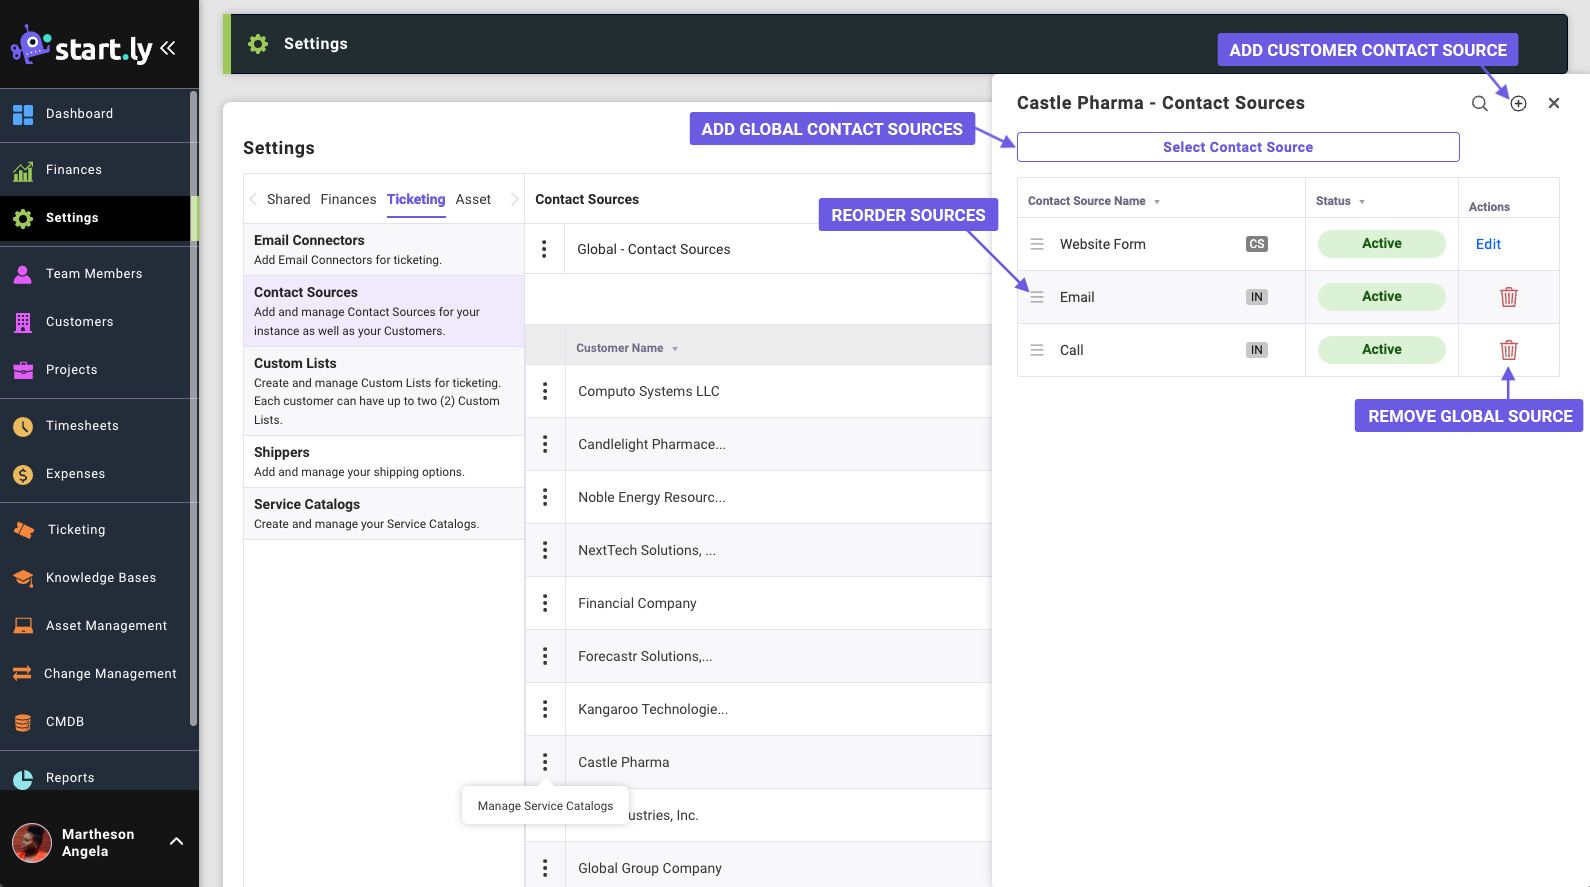
Create Customer Contact Sources
- Select Manage Contact Sources from the Action Menu for any Customer.
- To add Contact Sources from the Global list:
- Click Select Contact Sources button.
- Global Contact Sources are shown in a list. Check the Global Contact Sources you want to include for this Customer.
- Save your selections
- Items selected will be added to your Customer Contact Sources list. These items will have a “IN” icon noting that this source is from the Global list of the instance.
- To add a new Customer specific Contact Source:
- Select the Plus Icon to add a new Customer Contact Source.
- Enter a Contact Source Name.
- Save your New Contact Source.
- Sources that are Customer specific will have a “CS” icon noting that this source is customer specific.
Custom Lists
Each Customer is provided 2 Custom Lists to be used for Ticketing. Custom Lists can be renamed for each Customer, and each list can have unlimited List Items added. Custom Lists will appear on the Details card of a Ticket, where a user can select an item from the Custom List to add more information about the Incident/Service Request for reporting purposes.
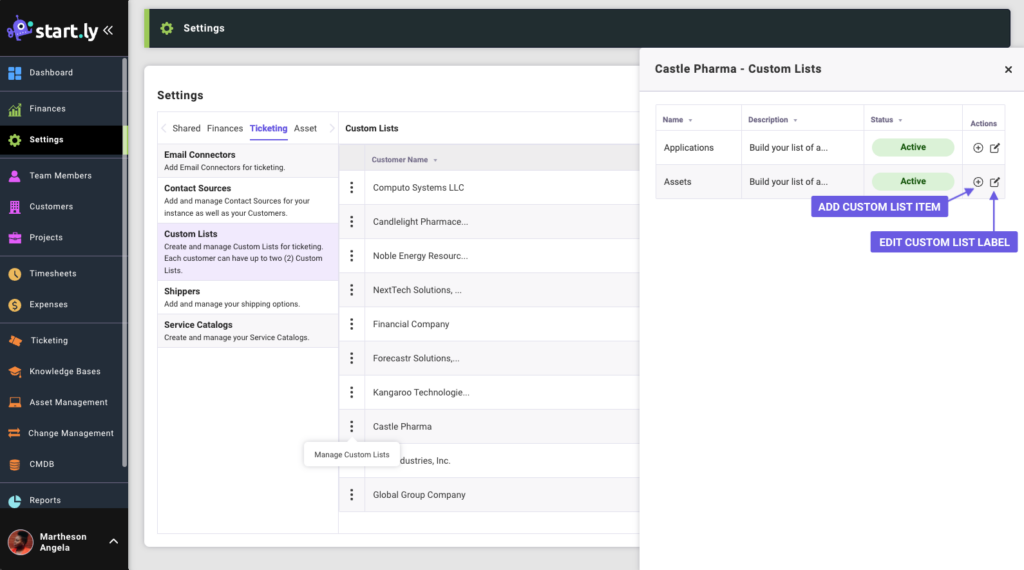
Edit & Rename Custom List Label
- Select Manage Custom Lists from the Action Menu for any Customer.
- Select the Edit Icon to edit the Custom List Label and Description
- Save your updates.
Add Custom List Items
- Select Manage Custom Lists from the Action Menu for any Customer.
- Select Custom List Label.
- Select the Plus Icon to add a Custom List Item.
- Enter a Name for the Item.
- Save the new item to the list.
Shippers
Define shipping information used within the Asset Management module.
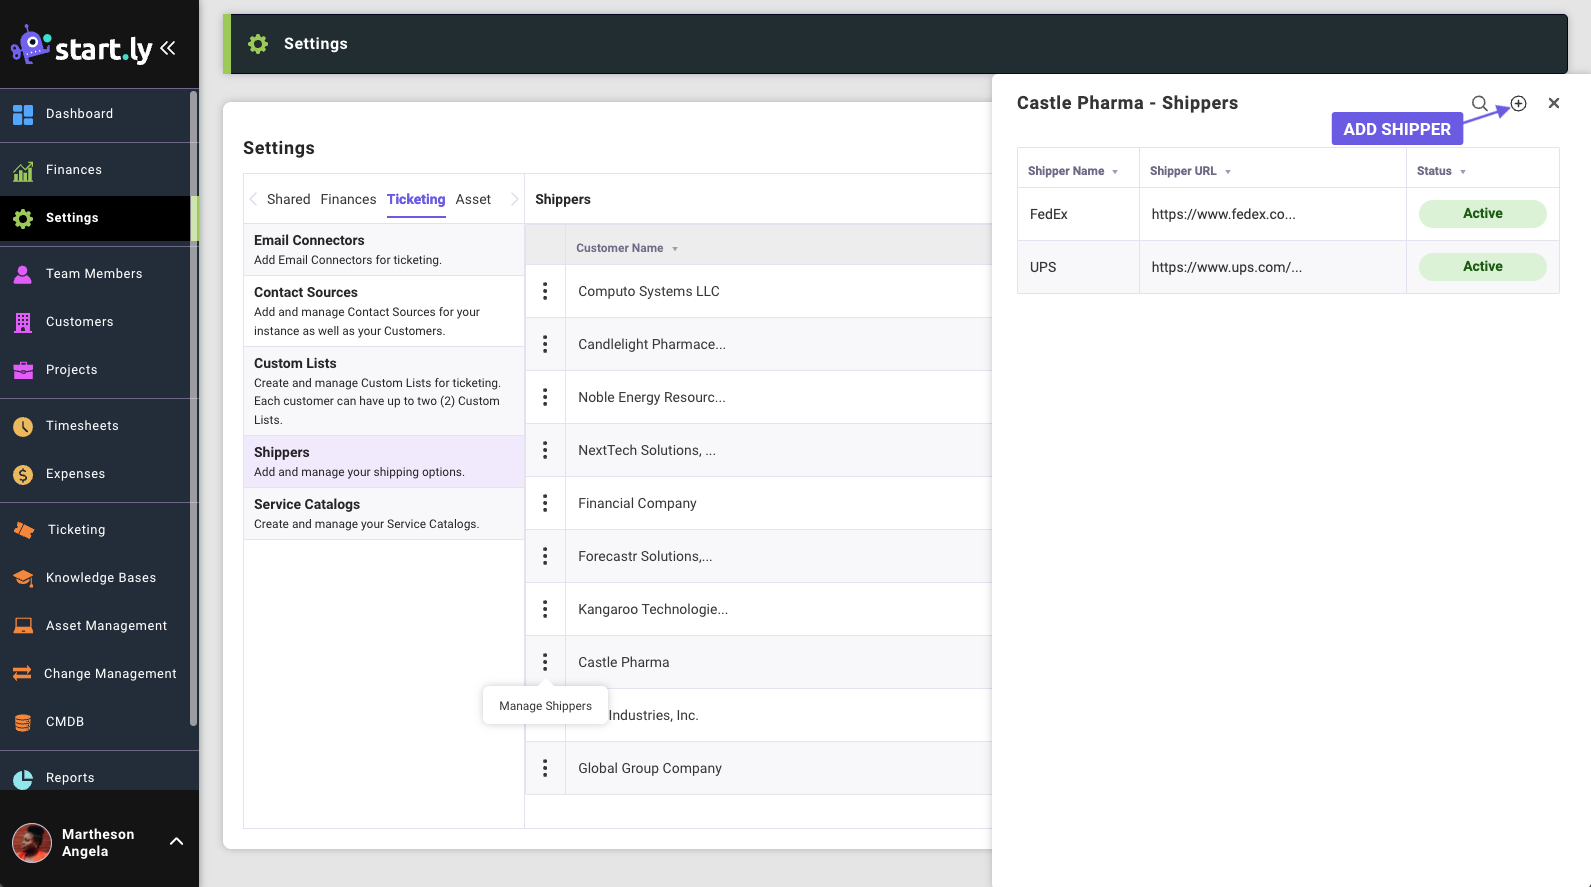
Add New Shipper
- Select Manage Shippers from the Action Menu for any Customer.
- Select the Plus Icon to add a new Shipper.
- Enter a Shipper Name and Website/URL for the Shipper.
- Save your New Shipper.
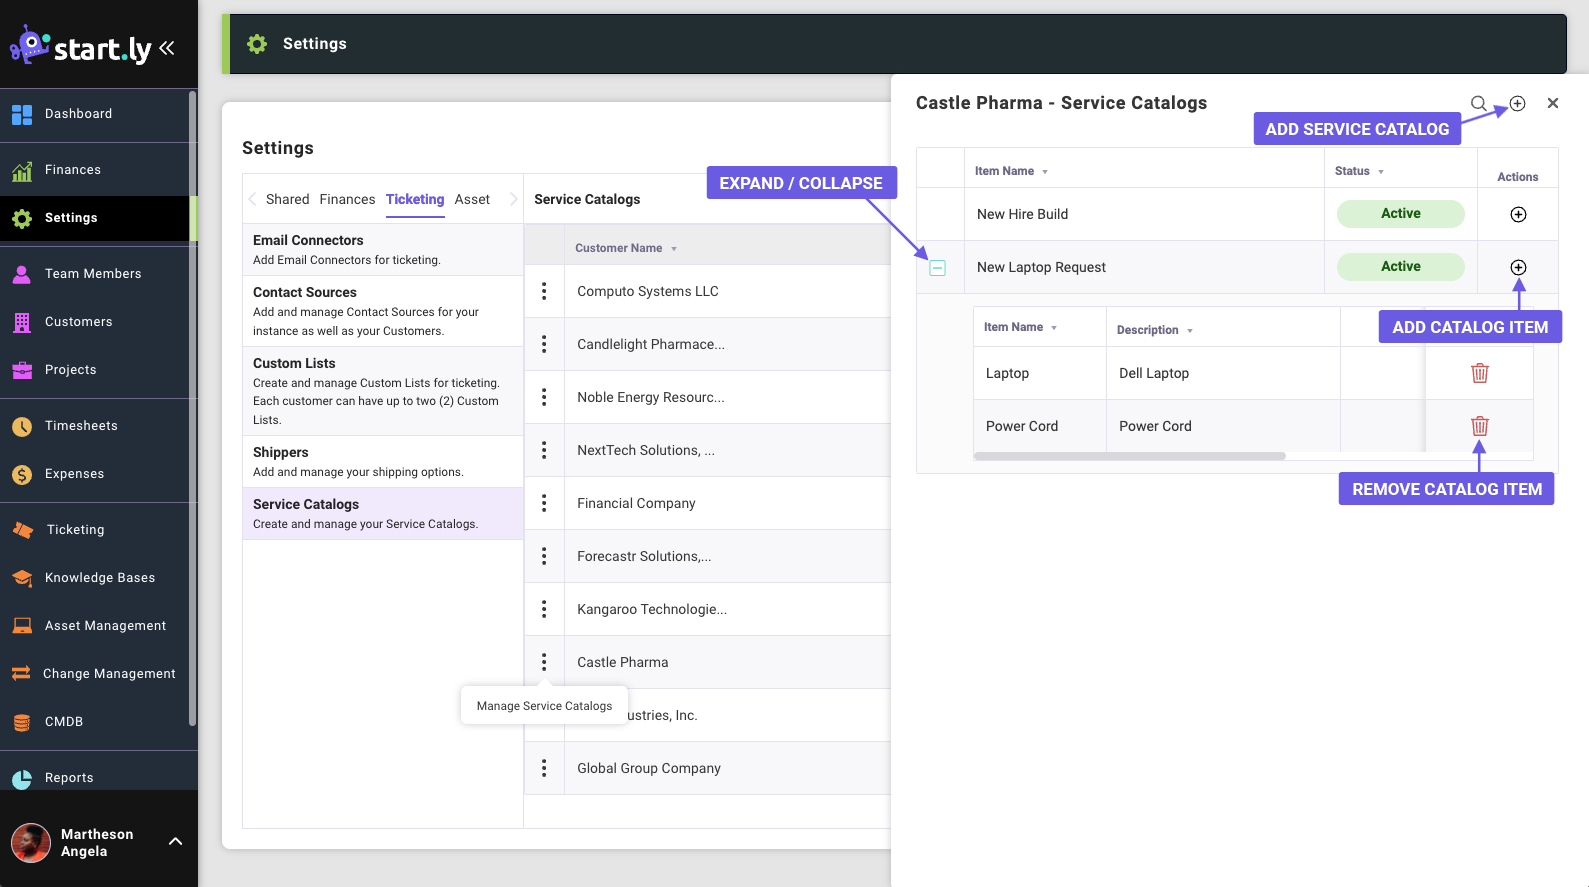
Service Catalogs
Service Catalogs are a grouping of items that can be selected by a support desk to help resolve a Service Request. Service Catalog Items can be individual assets or a grouping of assets with a unit price to help track costs. Service Catalogs and their items are defined at the Customer level and will be available on all Ticketing Projects for that Customer.
Create a New Service Catalog
- Select Manage Service Catalogs from the Action Menu for any Customer.
- Select the Plus Icon to add a new Service Catalog.
- Enter a Service Catalog Name.
- Save your New Service Catalog.
Create a New Service Catalog Item
- Select Manage Service Catalogs from the Action Menu for any Customer.
- From a Service Catalog listed, select the Plus Icon to add a new Catalog Item.
- Enter a Service Catalog Item Name.
- Enter a Description for the Item or Items included.
- Add a Fee for the item or a total fee for a bundle of items.
- Upload a file with work instructions for the item.
- Save your New Service Catalog Item.
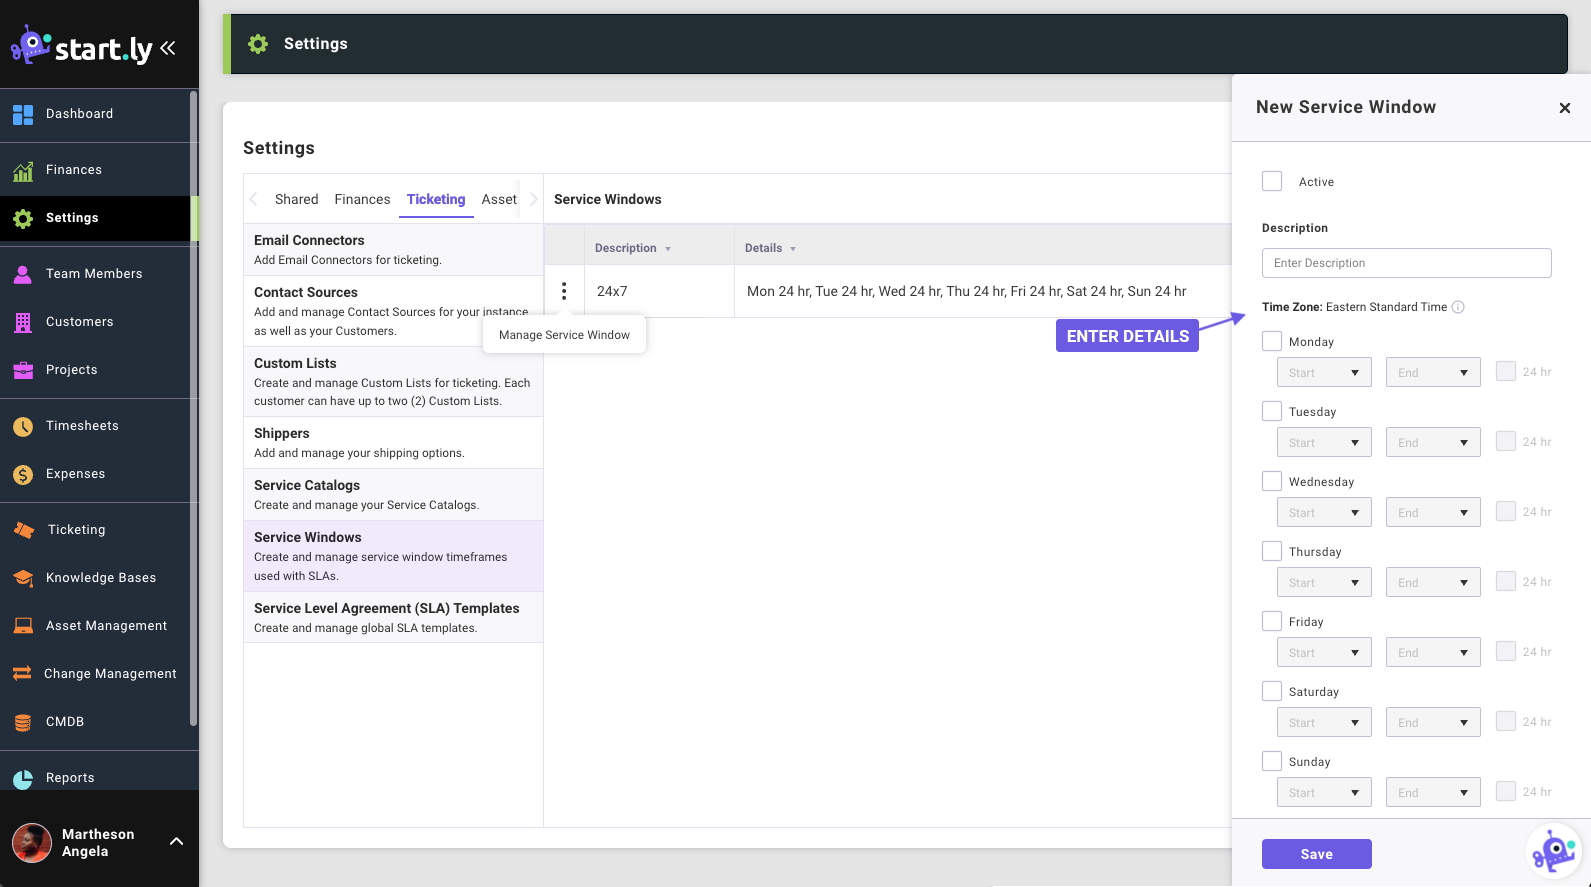
Service Window
Service Windows are operational windows of time for assignment group availability. Setting Service Windows are used when defining a Service Level Agreement (SLA). When creating a new window, make the Service Window active, add a Description and then define days and available hours.
Service Level Agreement (SLA) Templates
Create SLAs for projects to help define levels of service expected by your customers. From the SLA Template setting you can create common templates that can be selected at the project level on ticketing projects. SLAs can also be custom created at the project level as well.
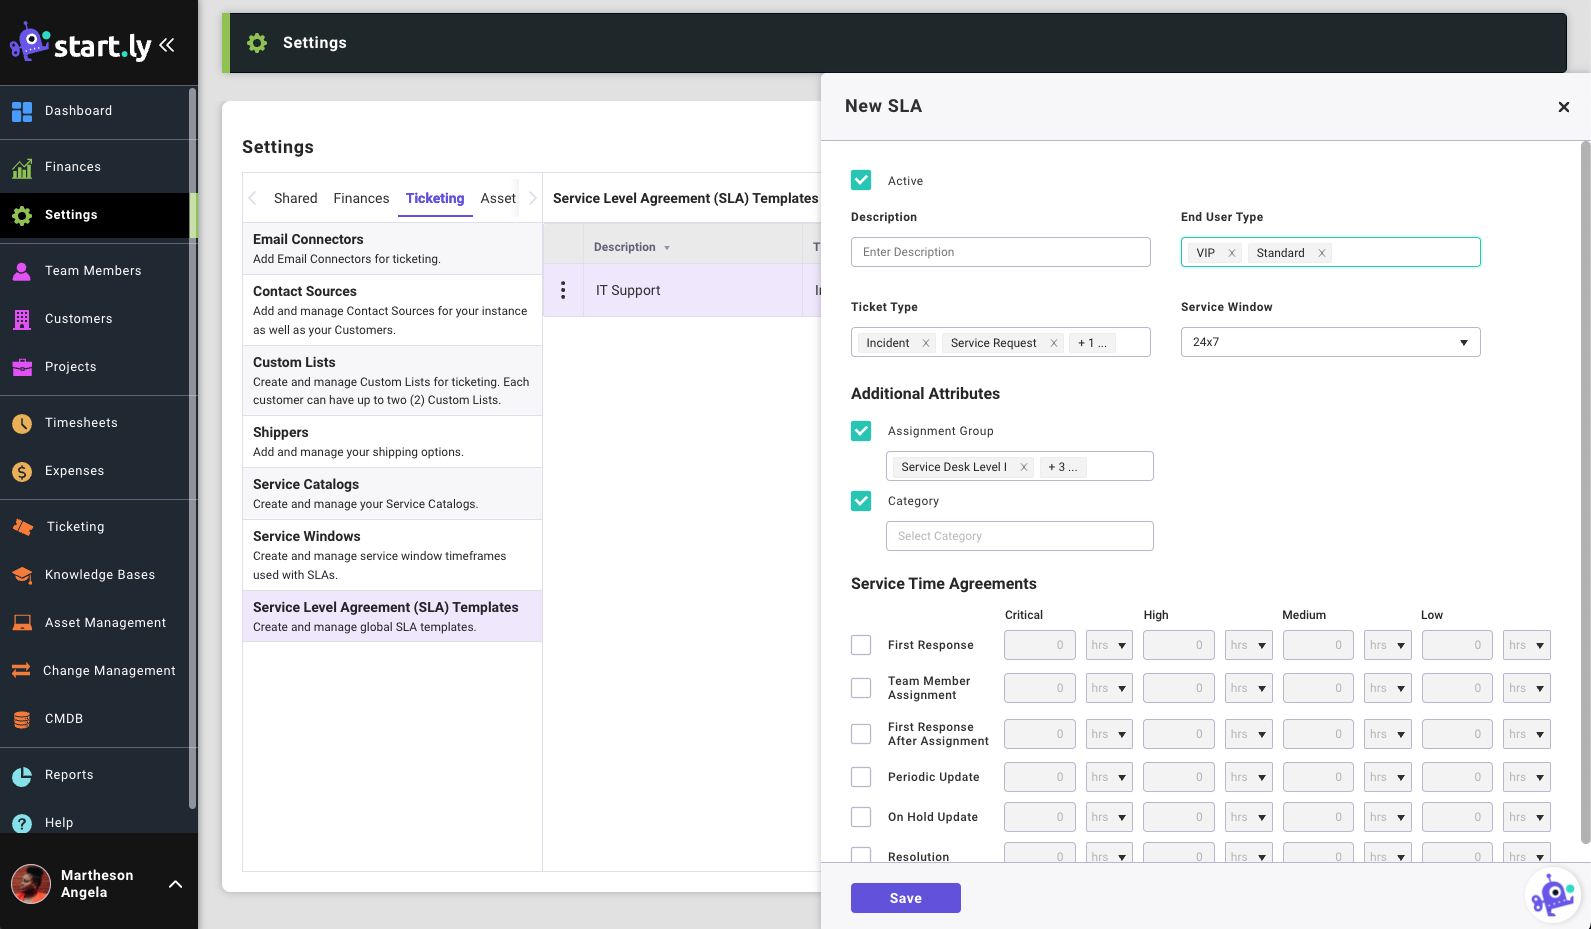
SLA Details
- Make the SLA active.
- Enter a Description for the SLA.
- Select End User Types:
- All – All End Users that submit a ticket on this project.
- VIP – End Users defined as VIP that submit a ticket on this project.
- Standard – End Users not defined as VIP that submit a ticket on this project.
- Select Ticket Types:
- All
- Incident
- Service Request
- Problem
- Select a Service Window:
- Available Service Windows are defined in the Service Window setting.
- Assignment Groups can be added to the template or at the project level.
- Ticketing Categories can be added to the template or at the project level.
- Manage SLA Notifications:
- Enable notifications for SLAs based on percent of time remaining (Less than 50%, Less than 25%) or a breach of an SLA.
- Define recipients for each enabled notification.
- Define Service Time Agreements:
- Select any of the services; First Response, Team Member Assignment, First Response After Assignment, Periodic Update, On Hold Update and Resolution.
- Enter values for Critical, High, Medium and/or Low for each selected service.
- Each value can be defined in minutes, hours, or days.
- By default, when a service time agreement is selected the option to Allow Notifications is selected. Uncheck Allow Notifications to turn off notifications for an individual service time agreement.
- To turn off notifications for an individual service time agreement uncheck Allow Notifications.